Google Workspace, which includes Drive, Docs, Sheets, and other software, is quickly becoming the go-to option for professional productivity.
According to Google, its cloud-based services had over two billion monthly active users at the end of 2019. That figure presents a significant advantage over Microsoft 365. Word, Excel, OneDrive, and other Microsoft services had about 200 million monthly users combined during the same year.
As more and more people use these services, it’s becoming necessary to augment workflows with electronic signatures. That’s why learning how to sign a Google Docs file directly on your browser can be productive.
Table of Contents
- How to Add an eSignature to Google Docs
- How to Sign Documents in Gmail
- Elevate Your Workflow With Fill
How to Add an eSignature to Google Docs
There are several ways to add your digital signature to a Google Docs document. These include drawing, inserting a photo signature, and using an app extension.
Below you’ll find these methods and their corresponding steps.
Insert a Google Docs signature by drawing
Google Docs has a built-in feature for signing documents. It’s not as comprehensive as third-party eSignature apps like Fill, but it’s a good starting point.
Follow these steps to generate a Google Docs signature.
- Open a document and locate the Insert tab on the toolbar.
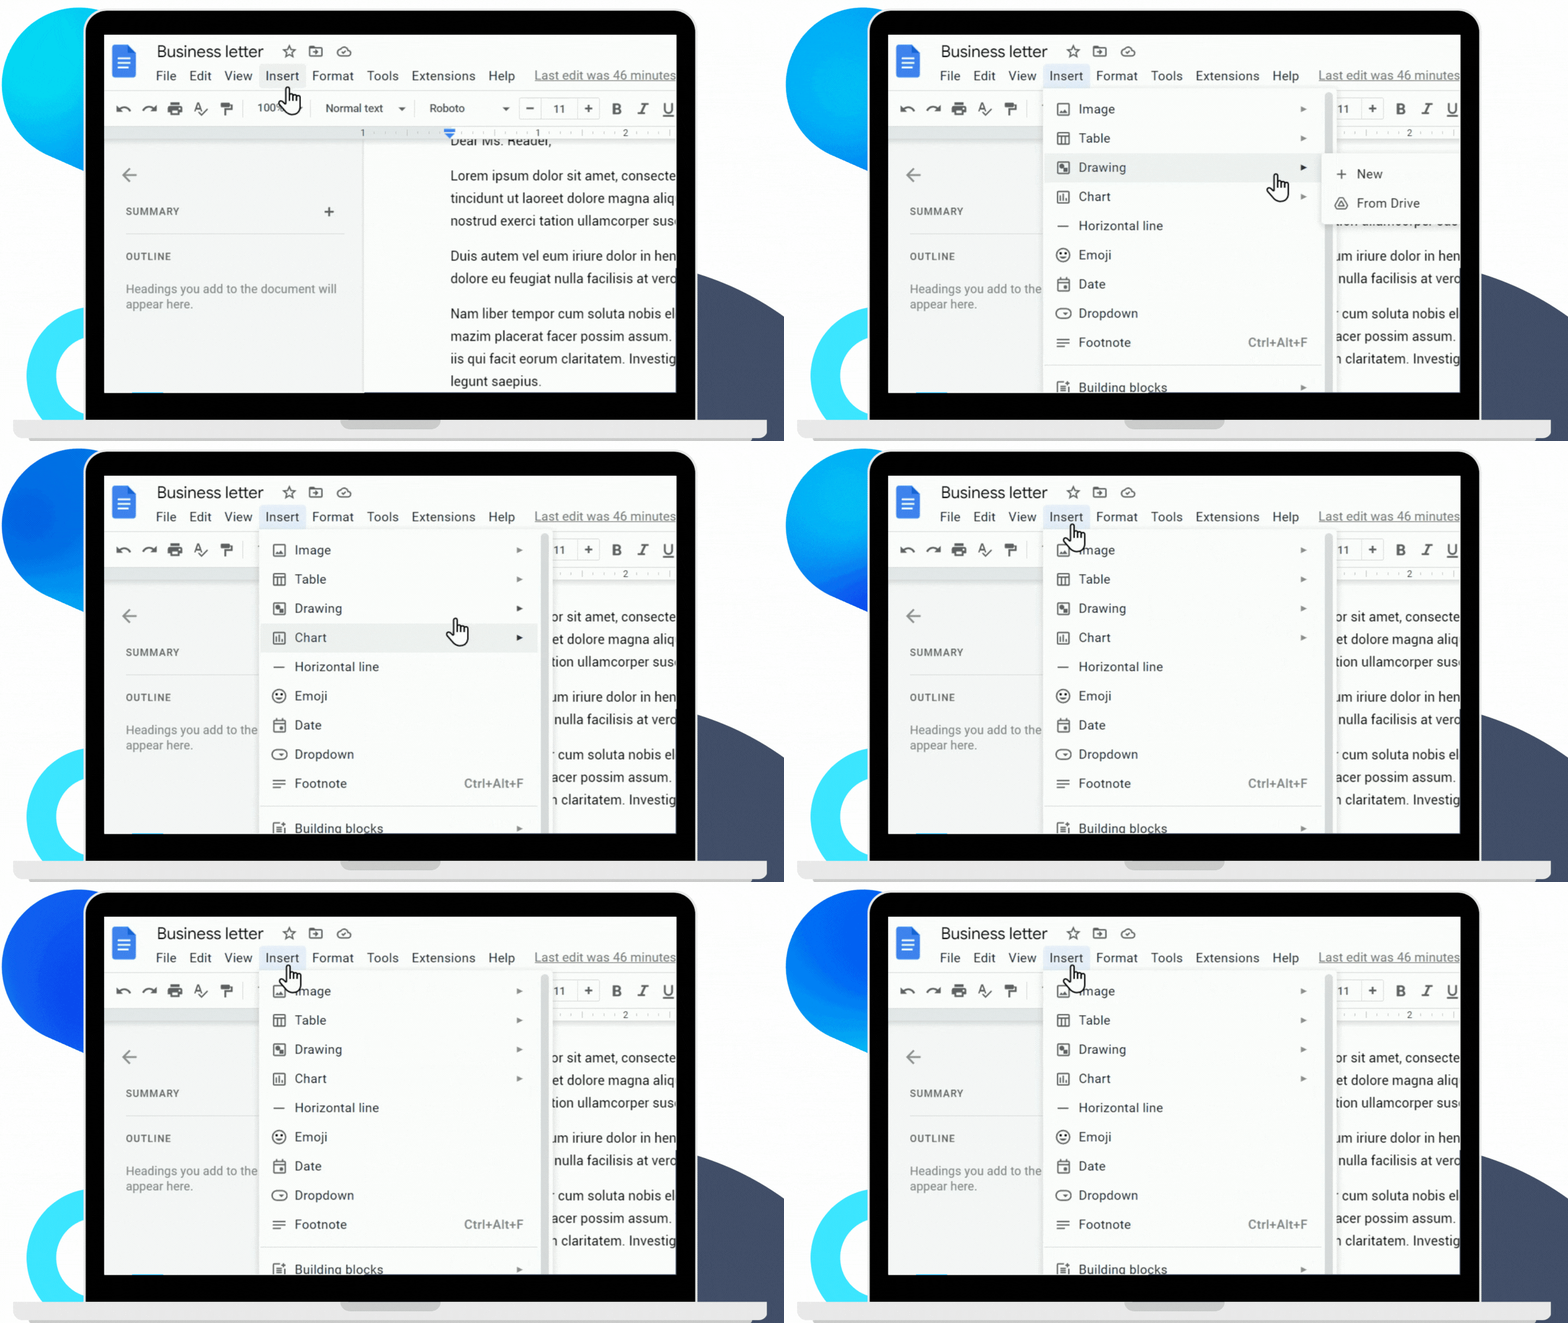
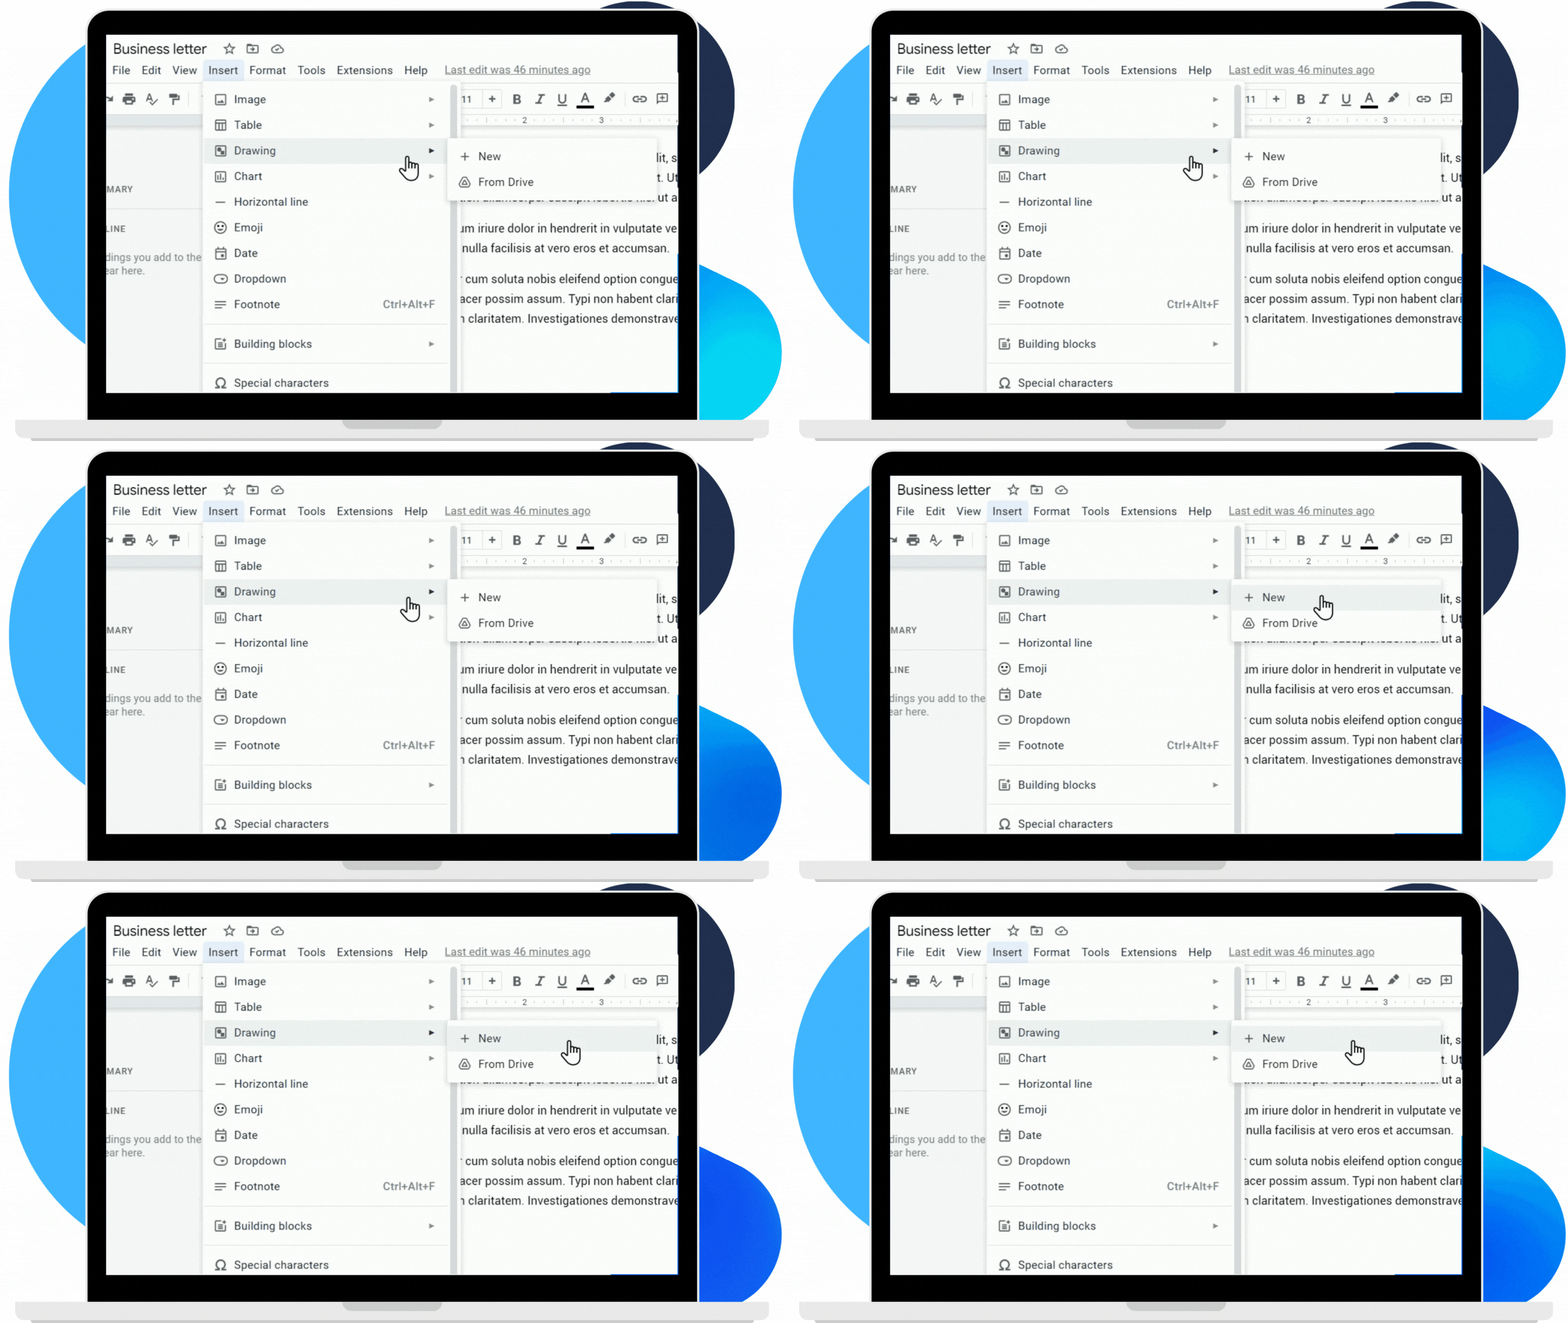
- Hover your cursor on the drawing button, then click the New button on the right.
- The drawing interface should pop up. Hover your cursor on the line icon, then select Scribble.
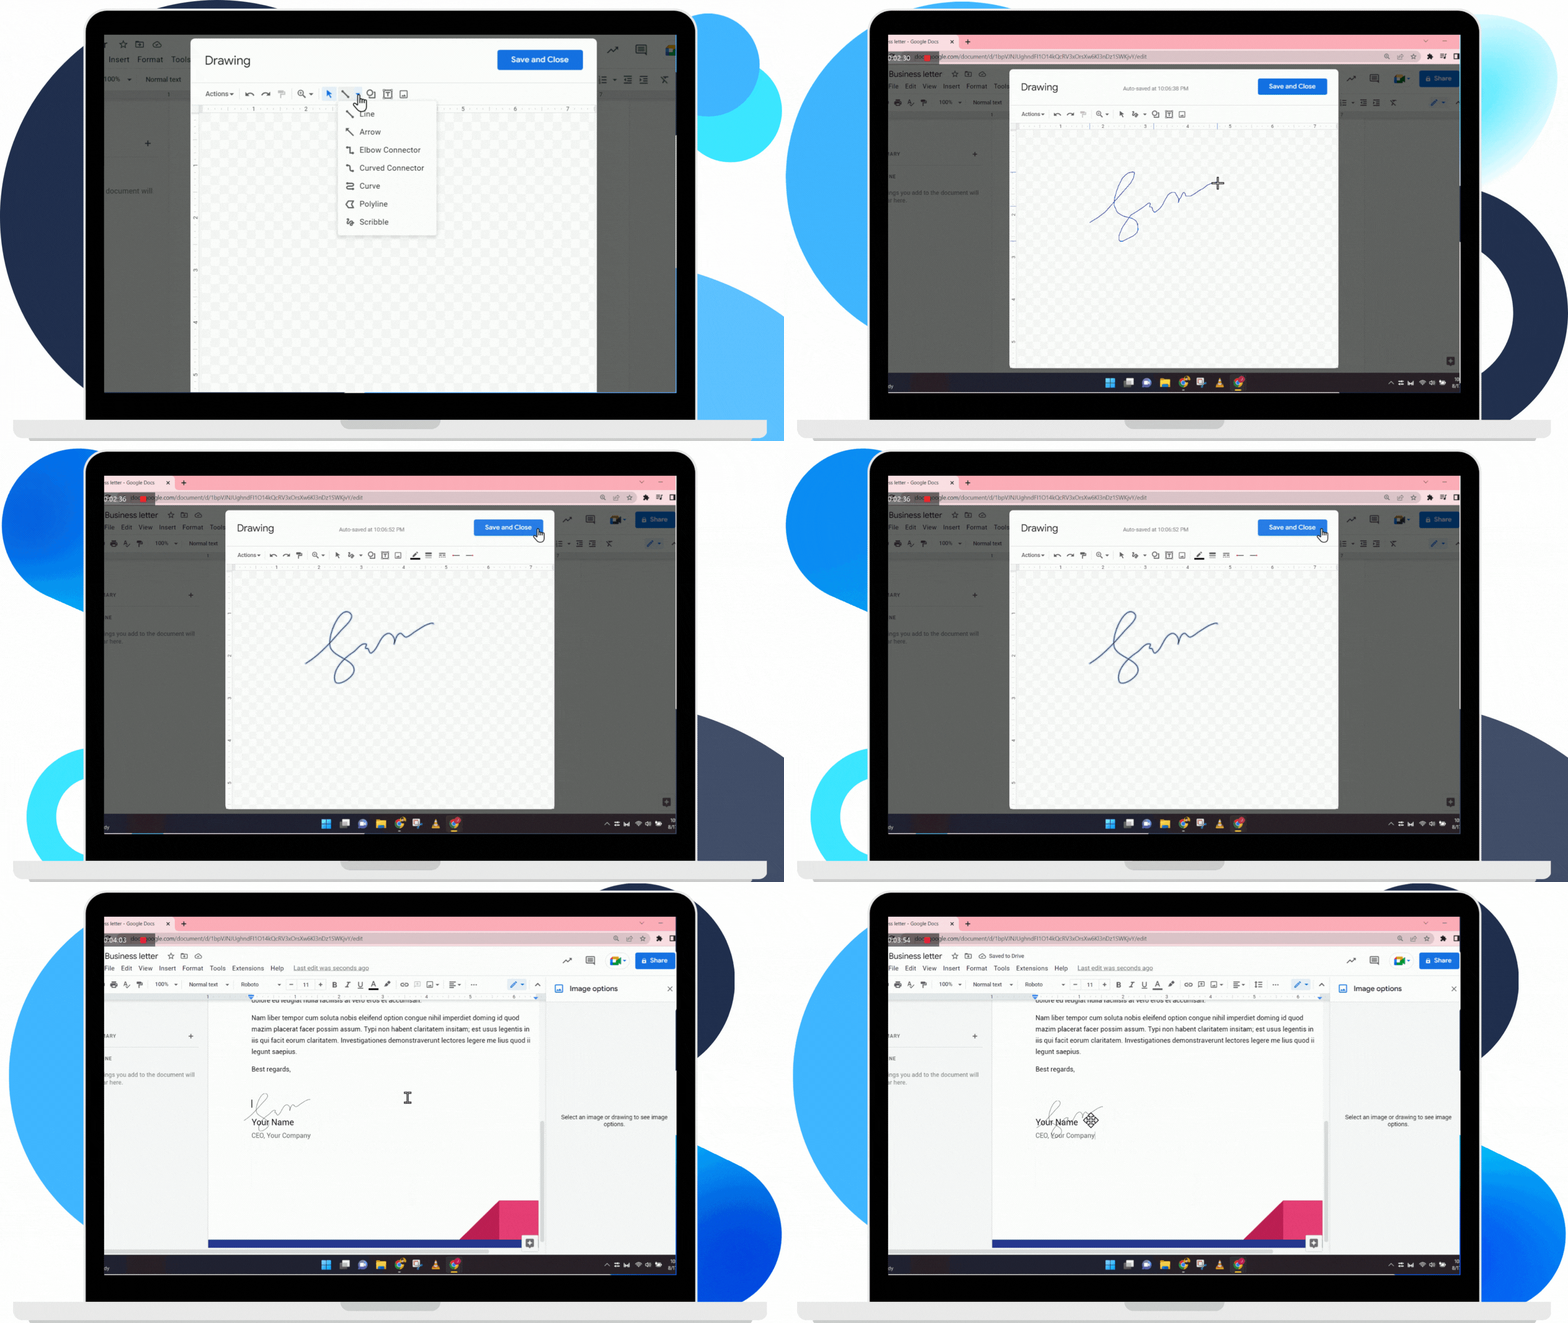
- You can now draw your eSignature using a mouse, trackpad, or digital drawing pen.
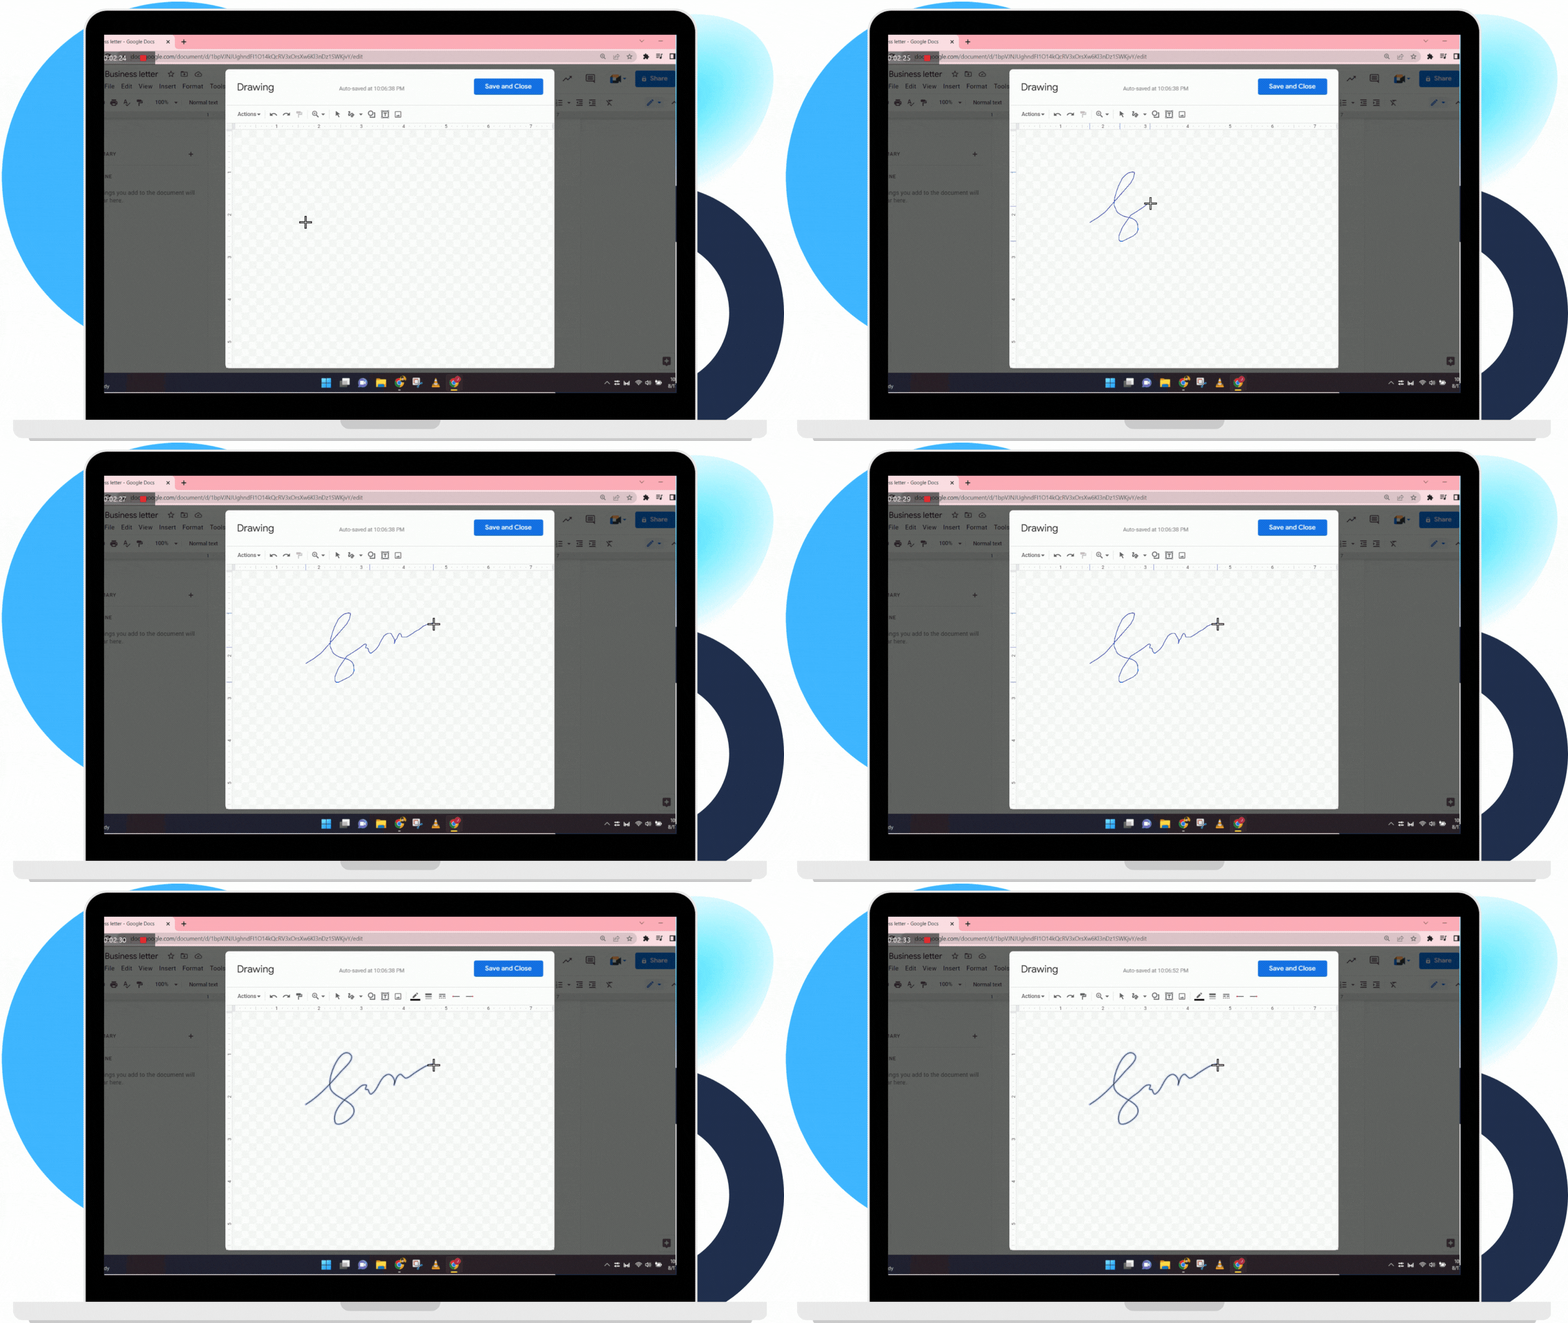
- Once done, click Save and Close.
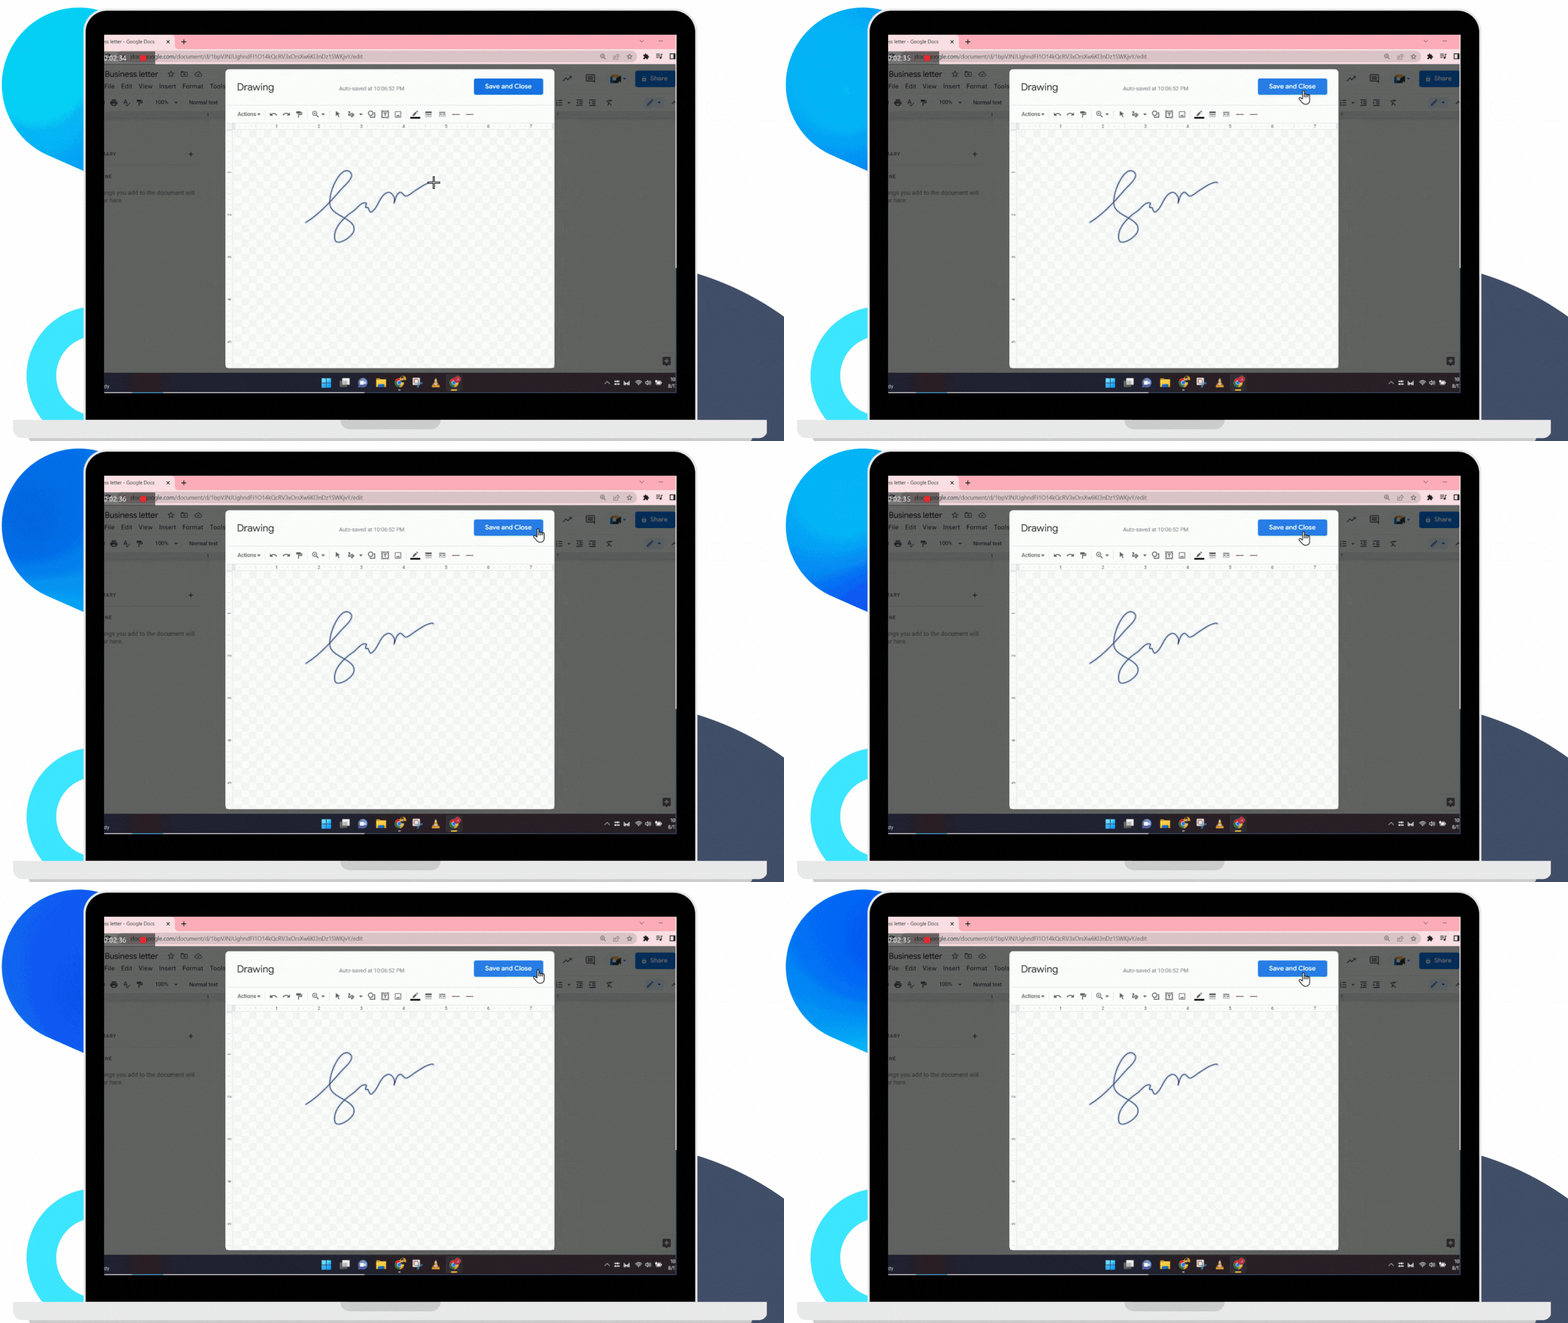
- Your digital signature should now be visible. You can then resize and drag the drawing to the appropriate field.
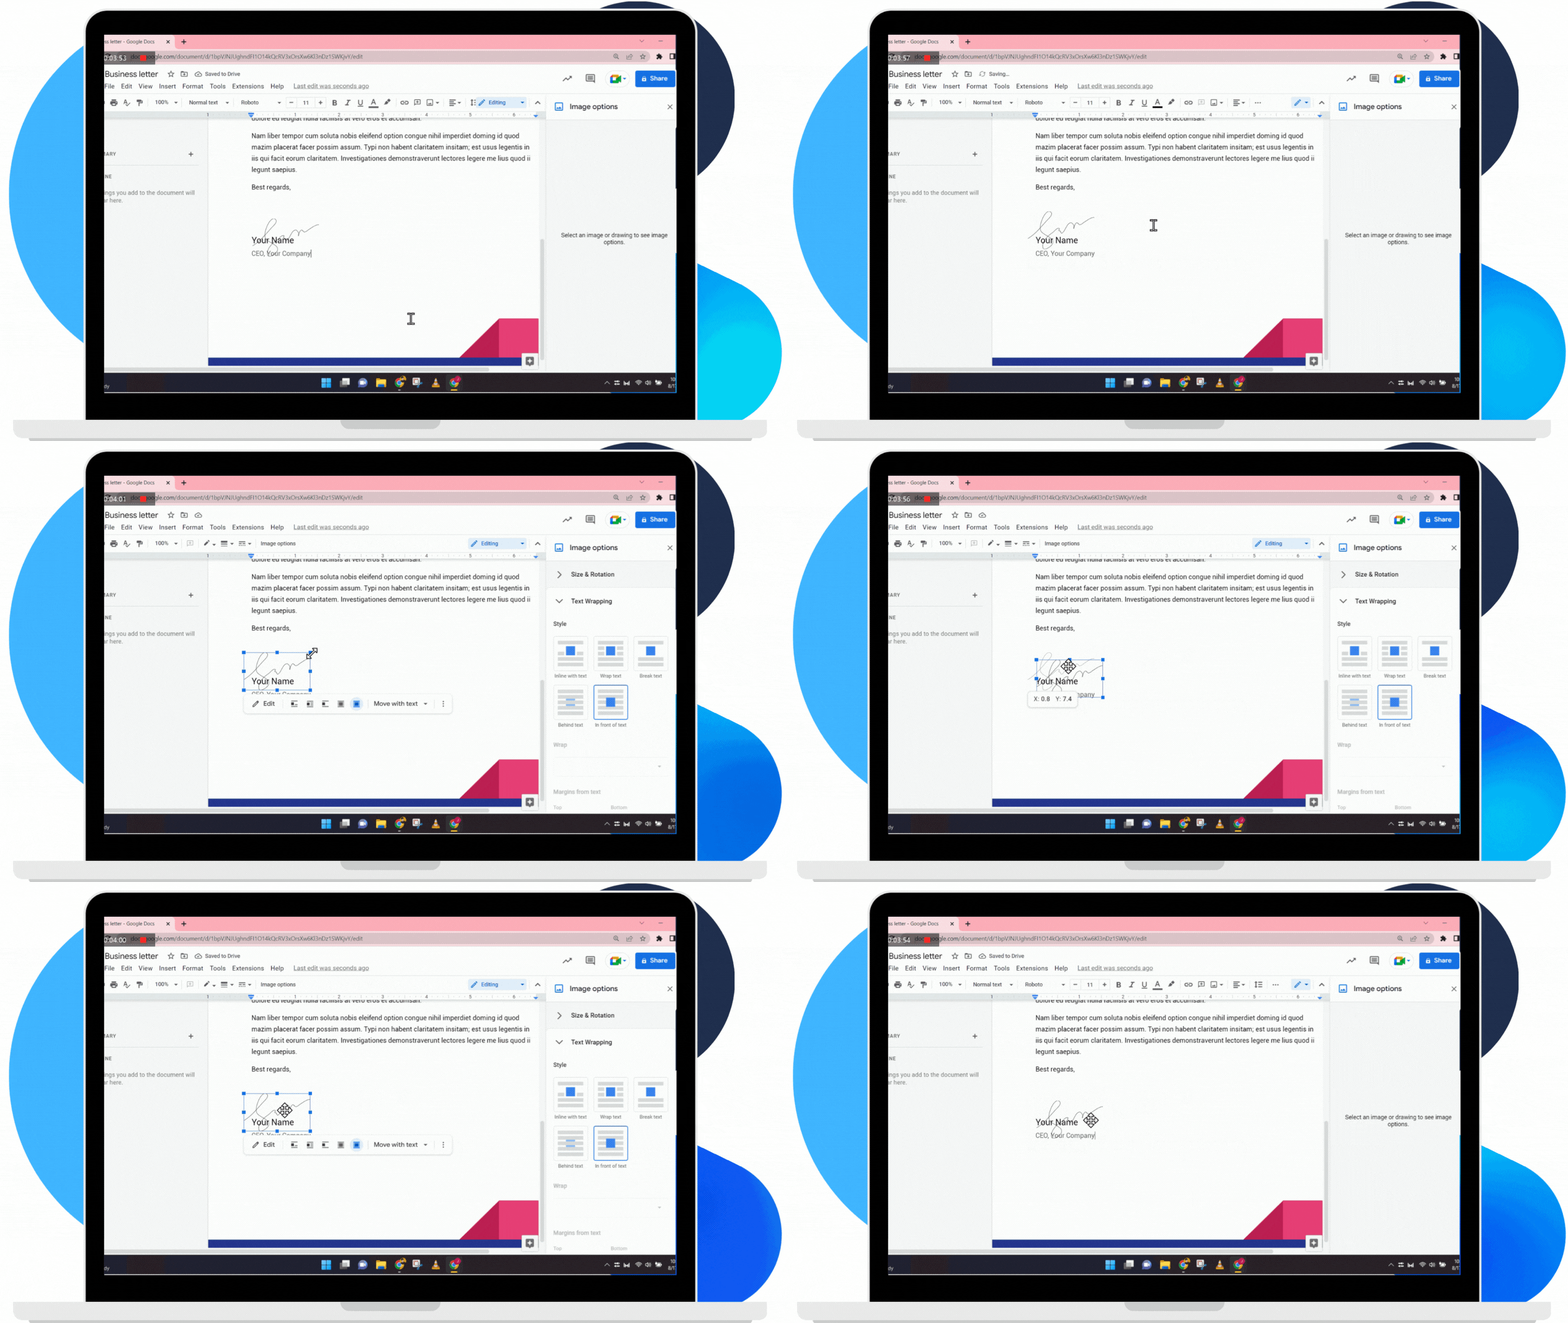
It’s that simple. The next time you need to sign a document in a pinch, this can give you a straightforward way to get it done.
The downside? The next time you need your eSignature, you’ll have to draw it again, which can be tedious. You can automate this process by opting for a dedicated online signature service.
Insert a digital wet copy signature
There’s a slightly more convenient way to add your eSignature to any document. It involves using a photo of your physical signature. With this option, you can take advantage of a pre-existing signature, so you won’t have to create a new one.
To use this method, do the following:
- As with the previous process, open a document and find the Insert tab on the toolbar.
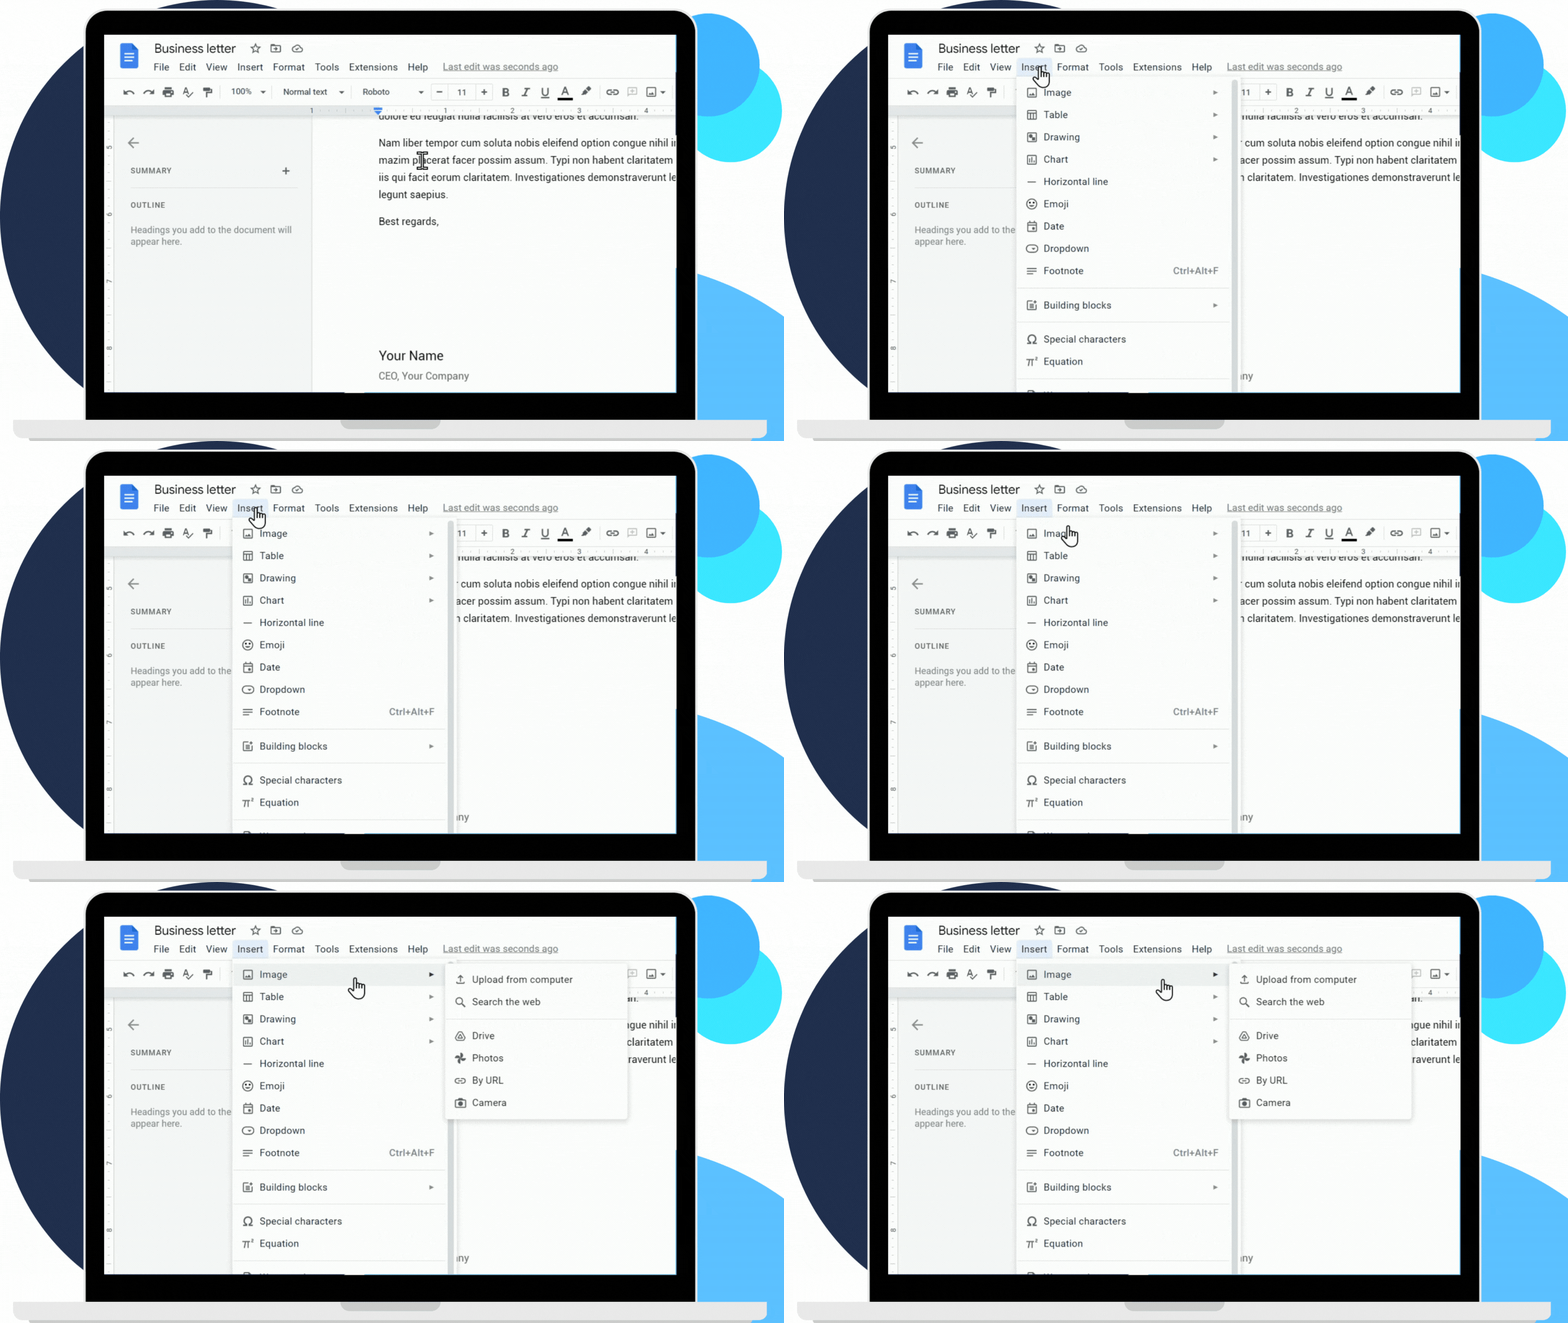
- This time, hover your cursor on the Image tab and click on Upload from computer.
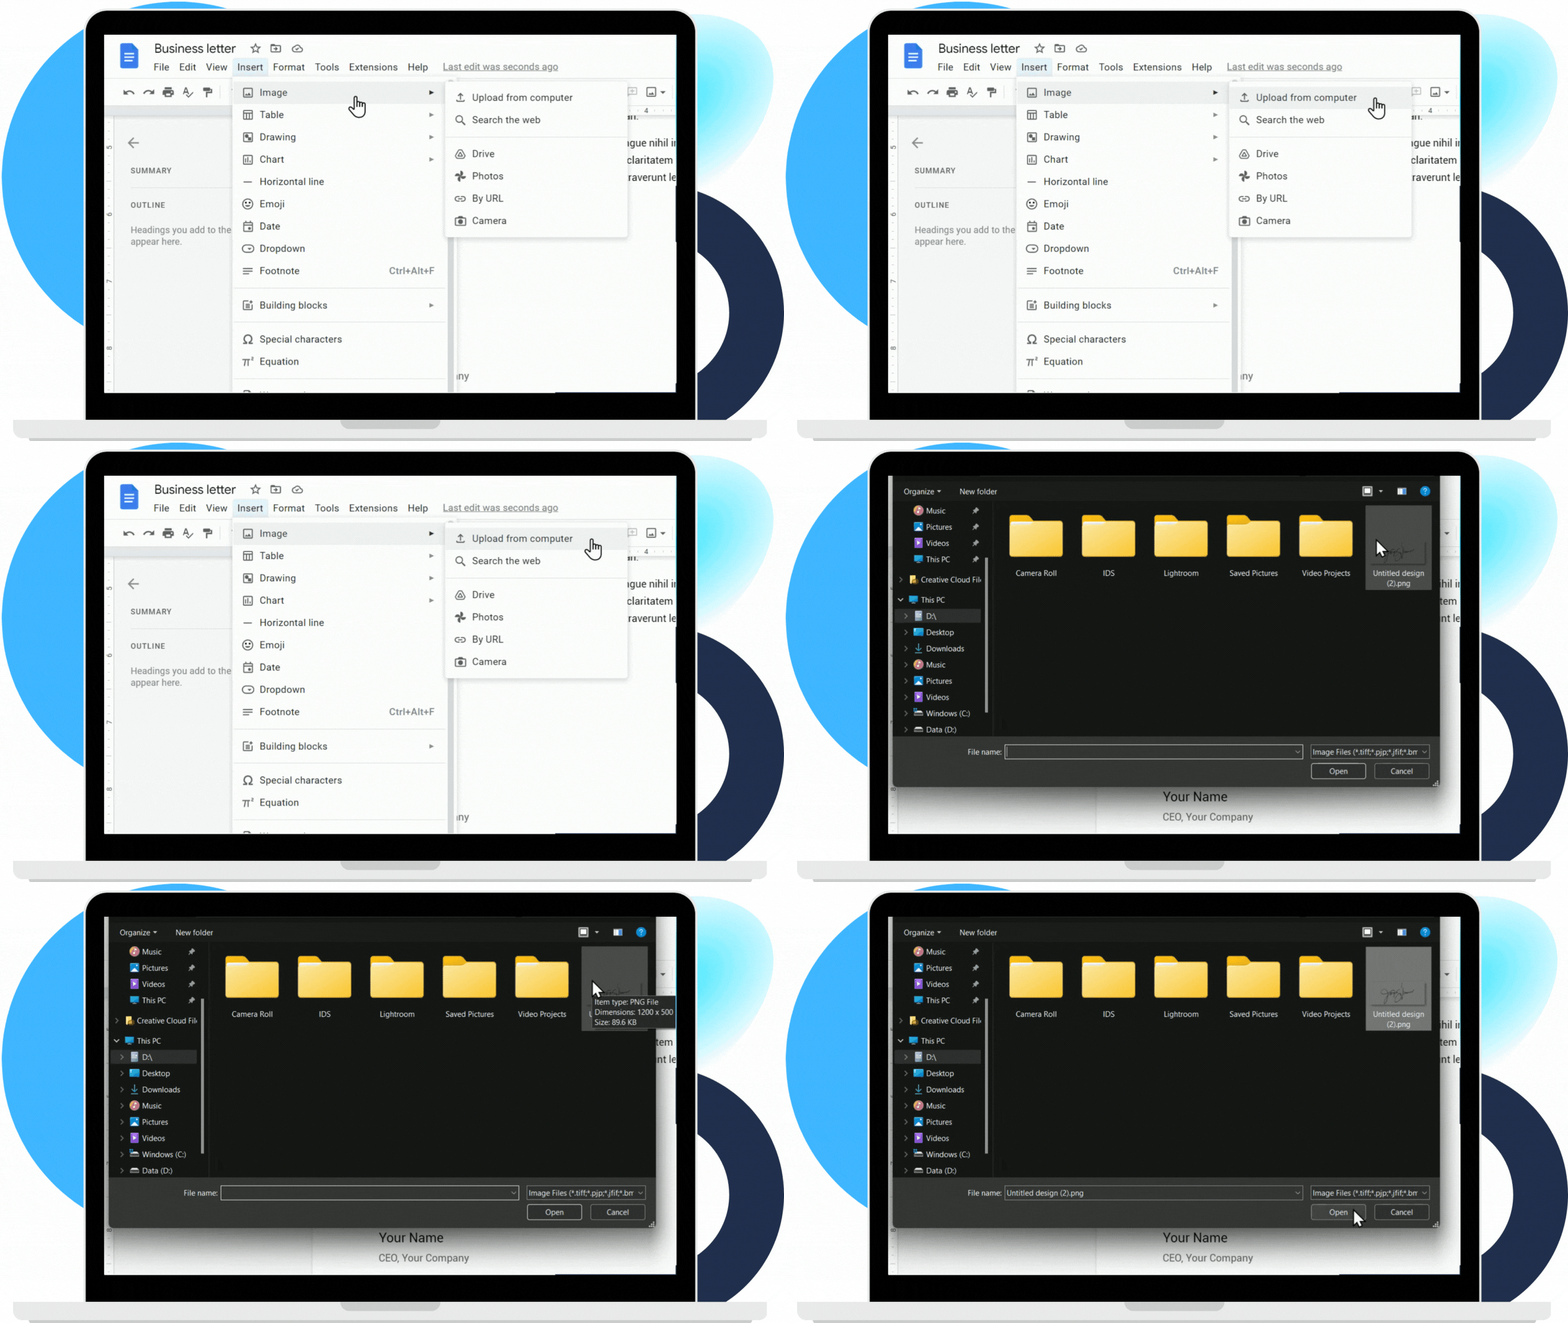
- Then, open the saved image of your signature.
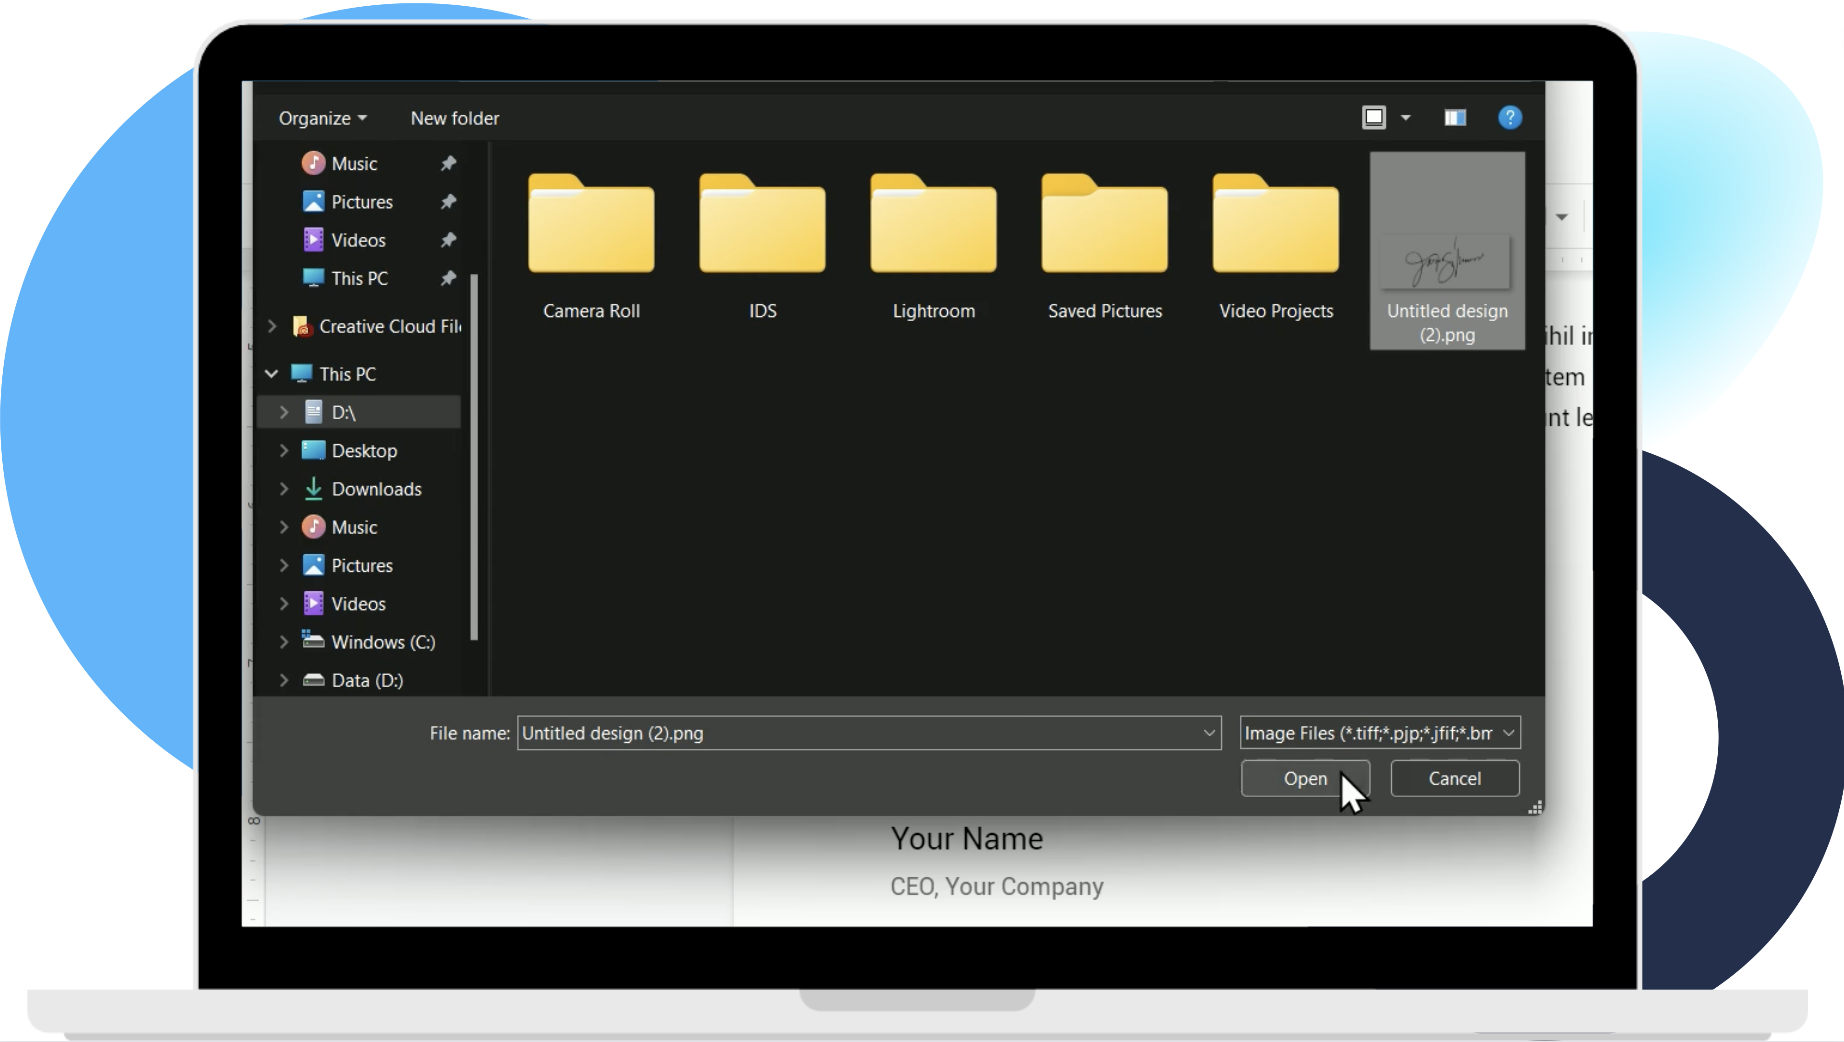
- The eSignature should now appear inside the document. You can scale and place the image anywhere you like.
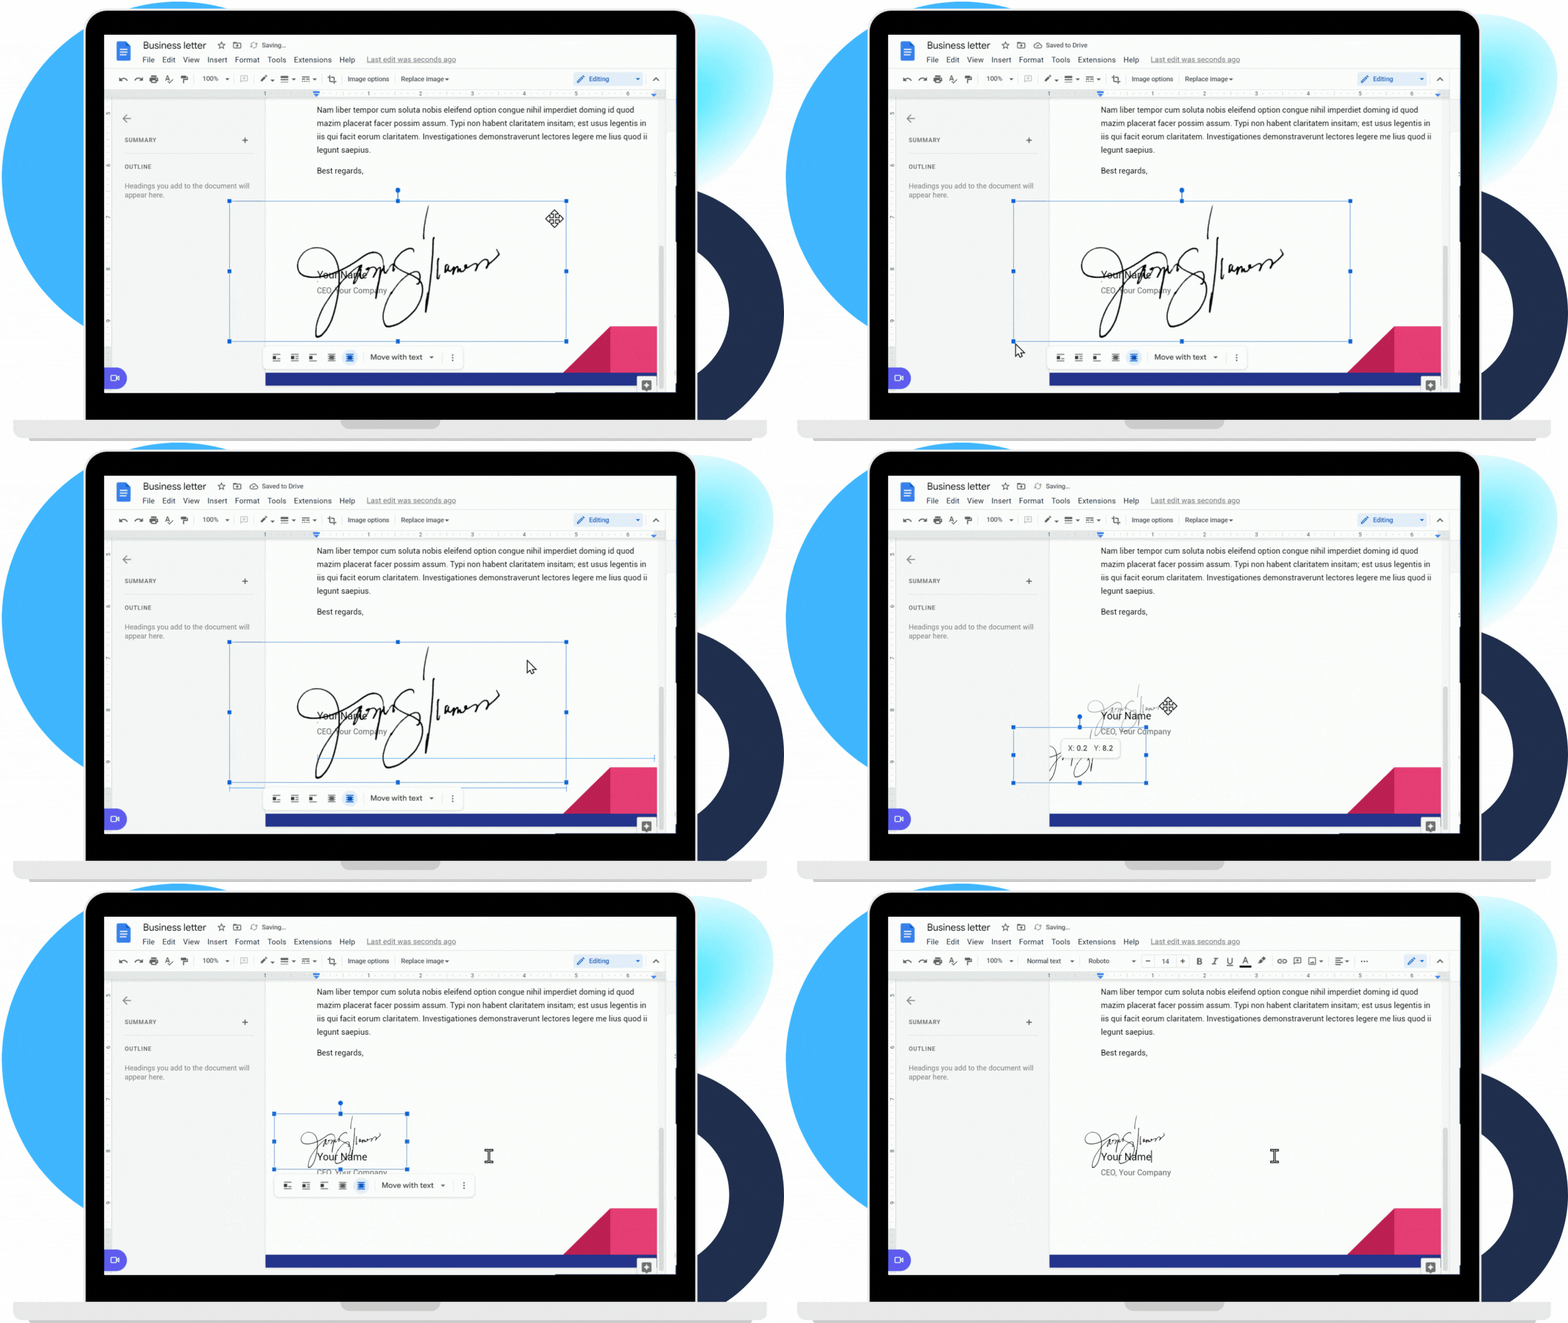
Like the previous method, uploading a wet signature comes with its share of limitations. For example, a low-quality image would look out of place within the document. Images with a non-transparent background could also have a similar effect. Both may be considered invalid if they are difficult to read.
Create a digital signature using an eSignature service
When you use Fill, you can electronically sign and send documents straight from Google Drive. The steps outlined below will show you how to do this.
- Navigate to the Google Workspace Marketplace and search for Fill.
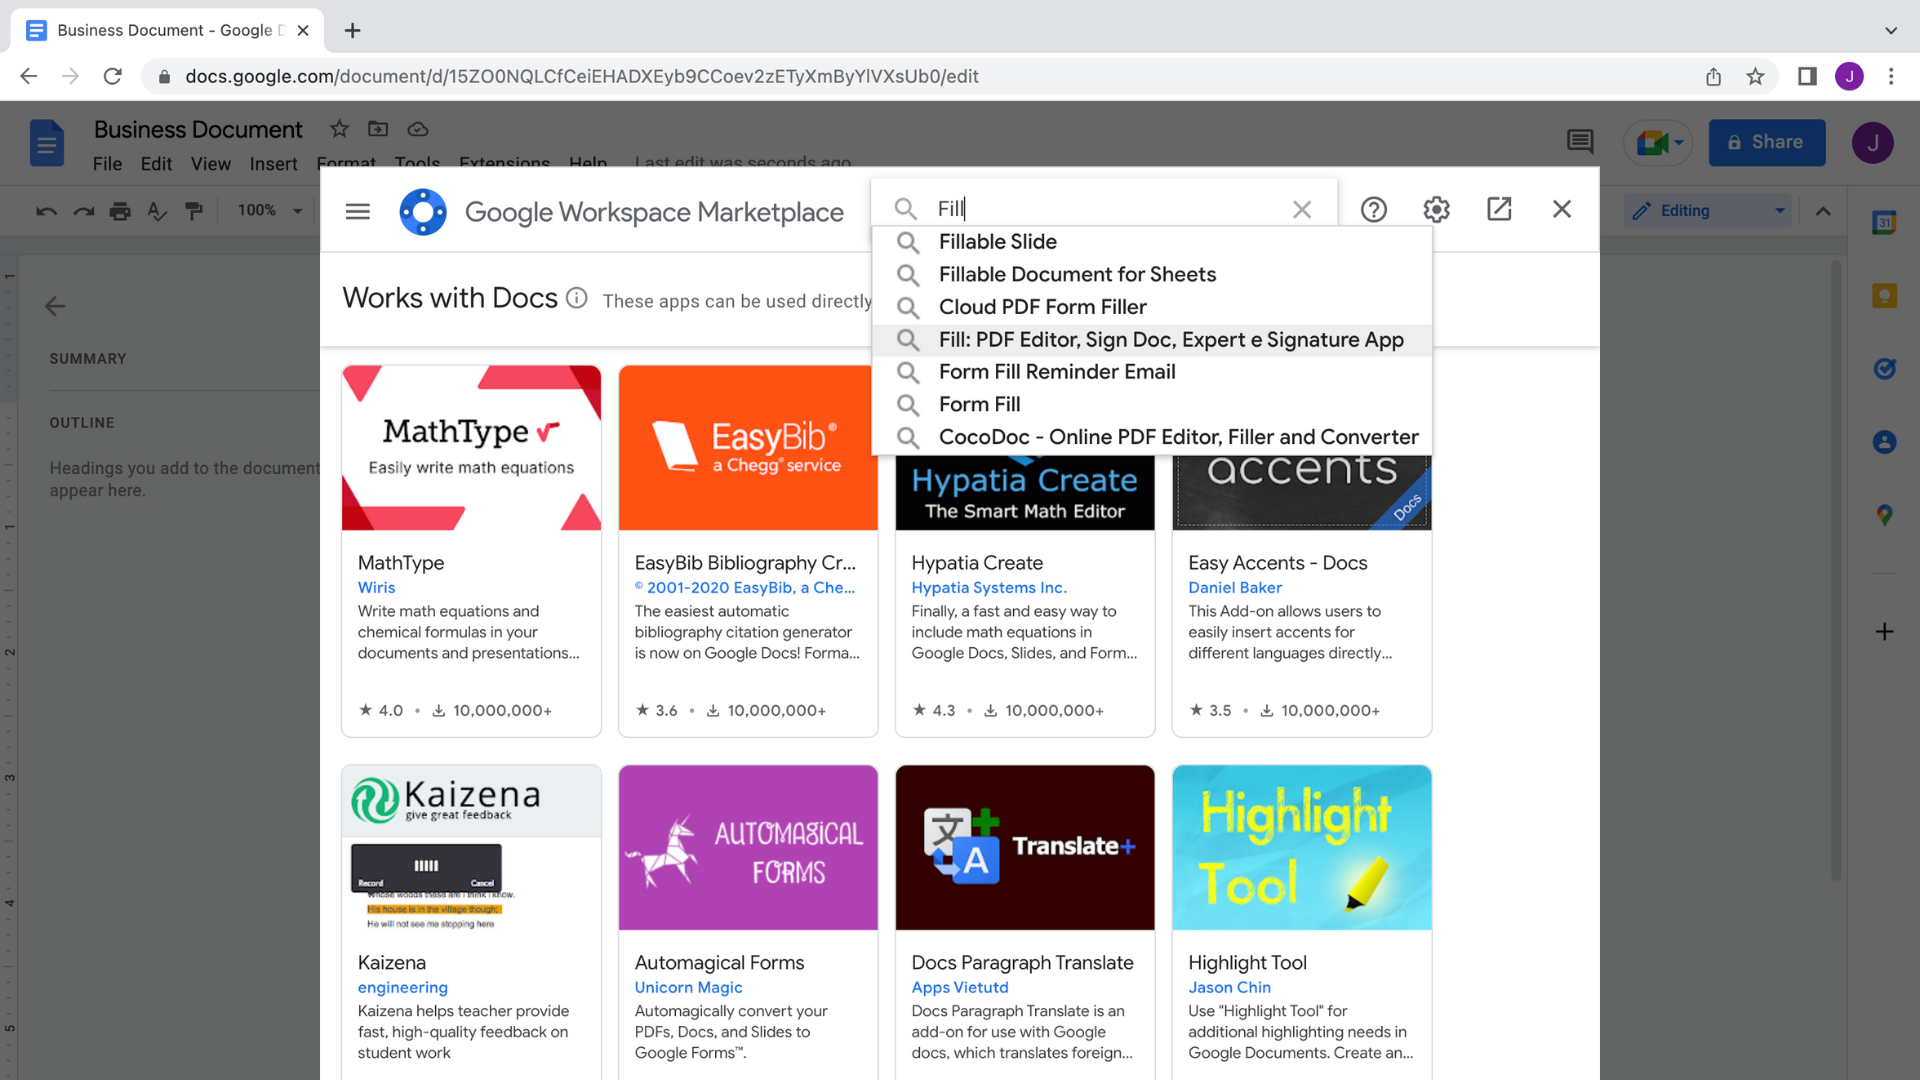
- Install the app extension to connect the service to your Google Drive account.
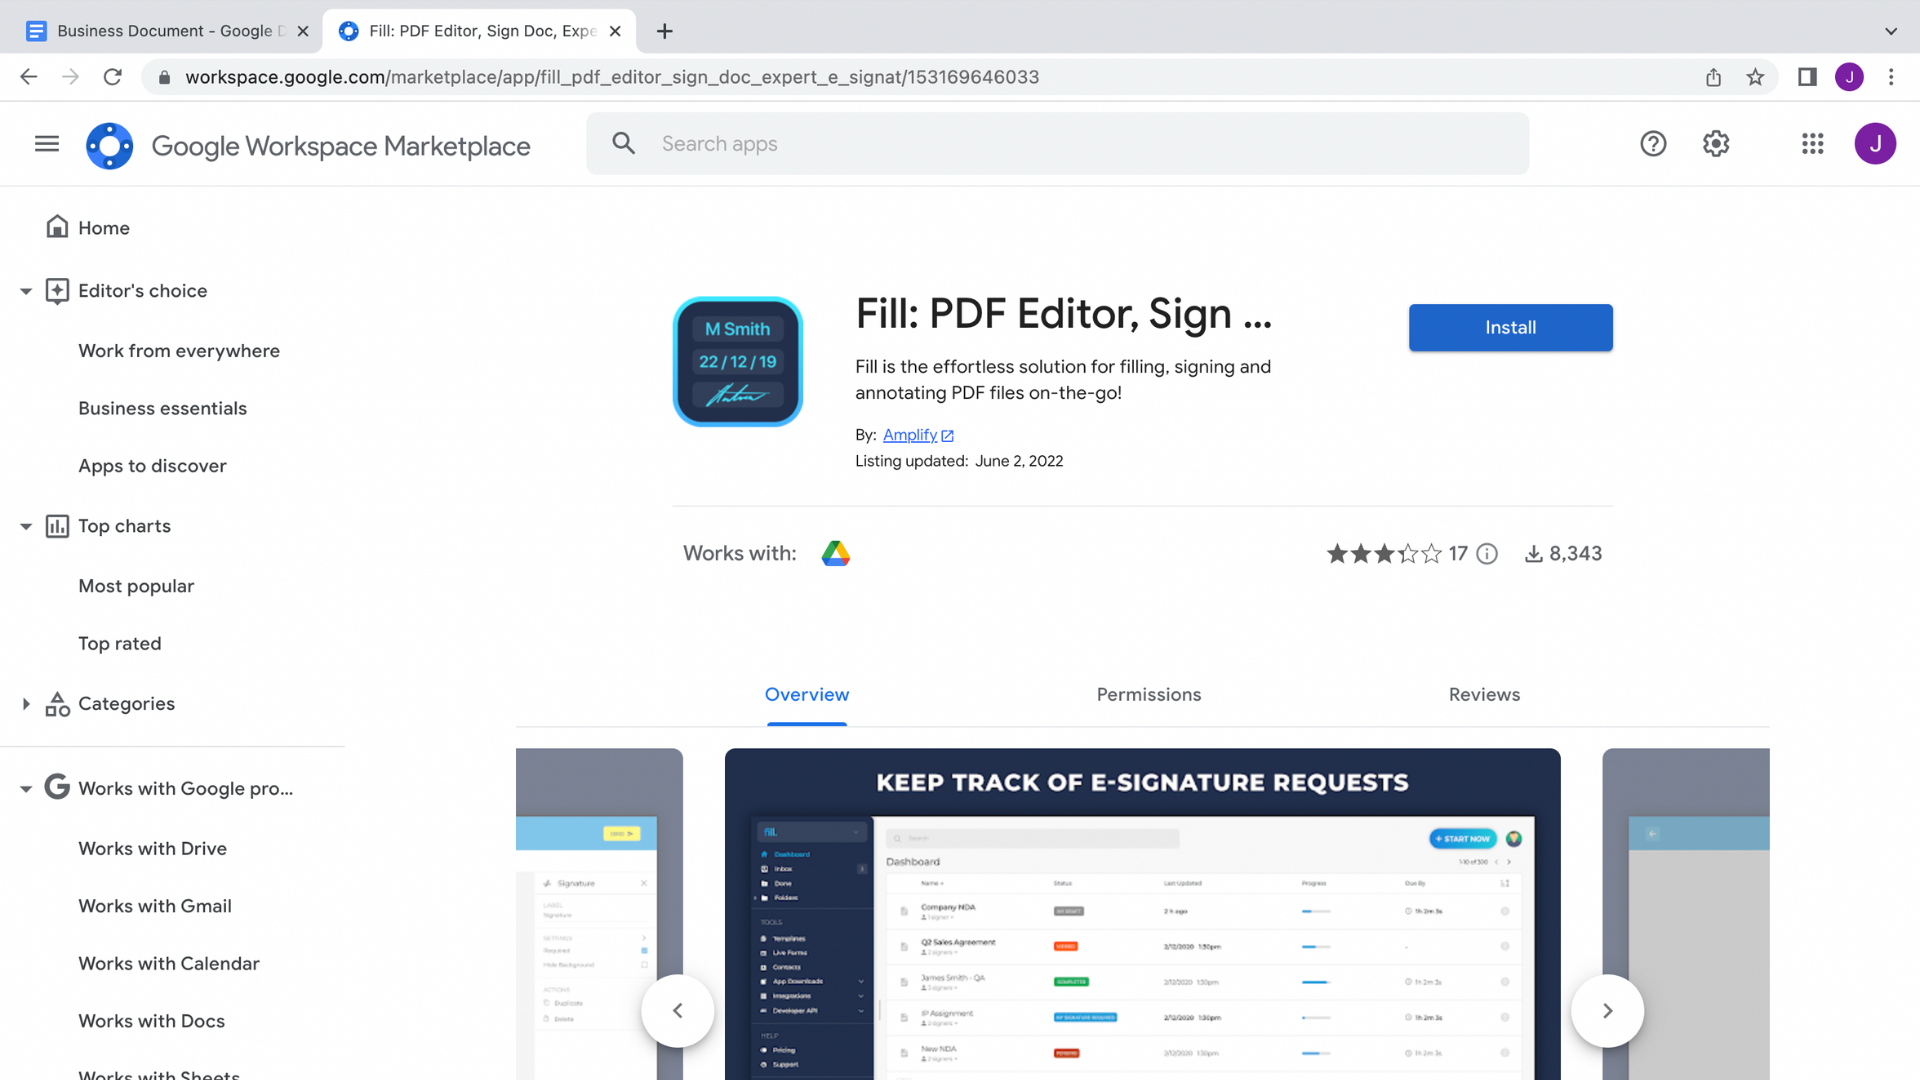
- Once installed, you can find Fill under the Apps Launcher or as an option for opening Google Docs files.
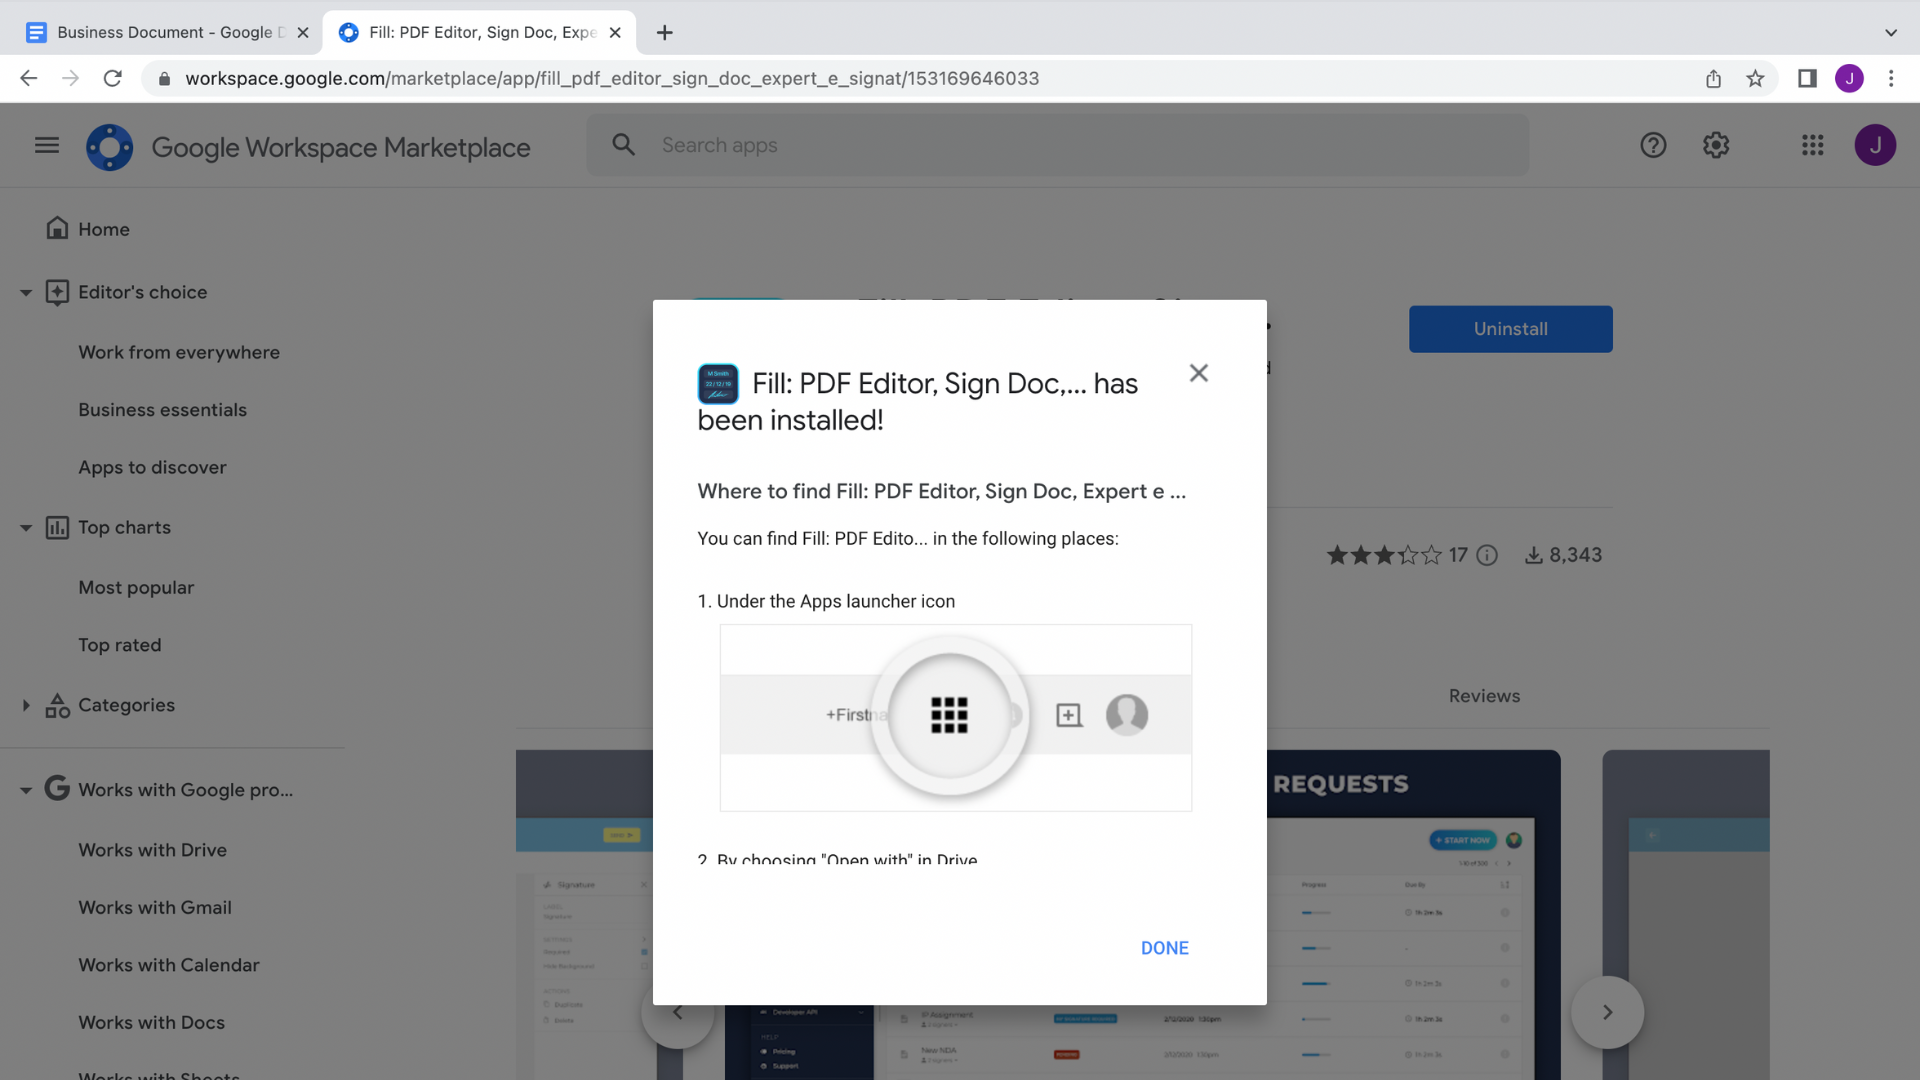
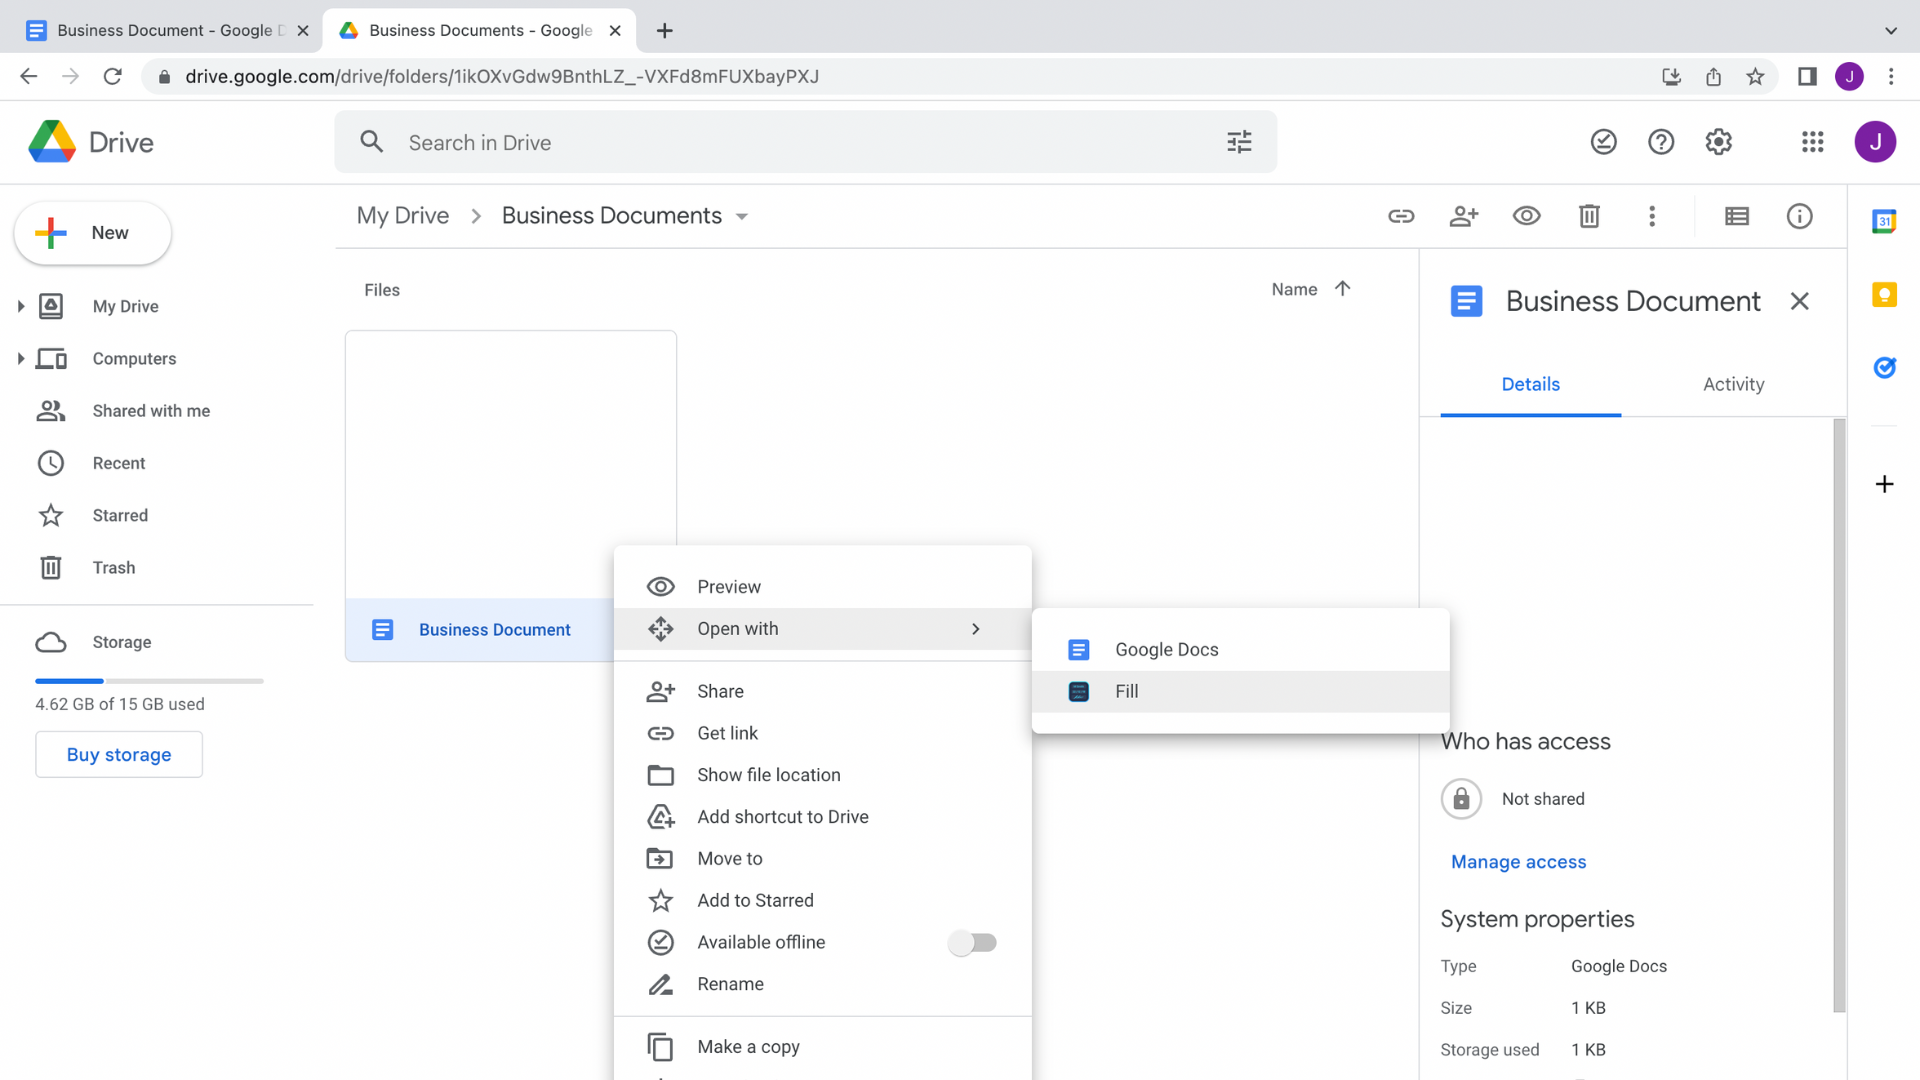
- Next, go to Google Drive and right-click on a document to open it with Fill.
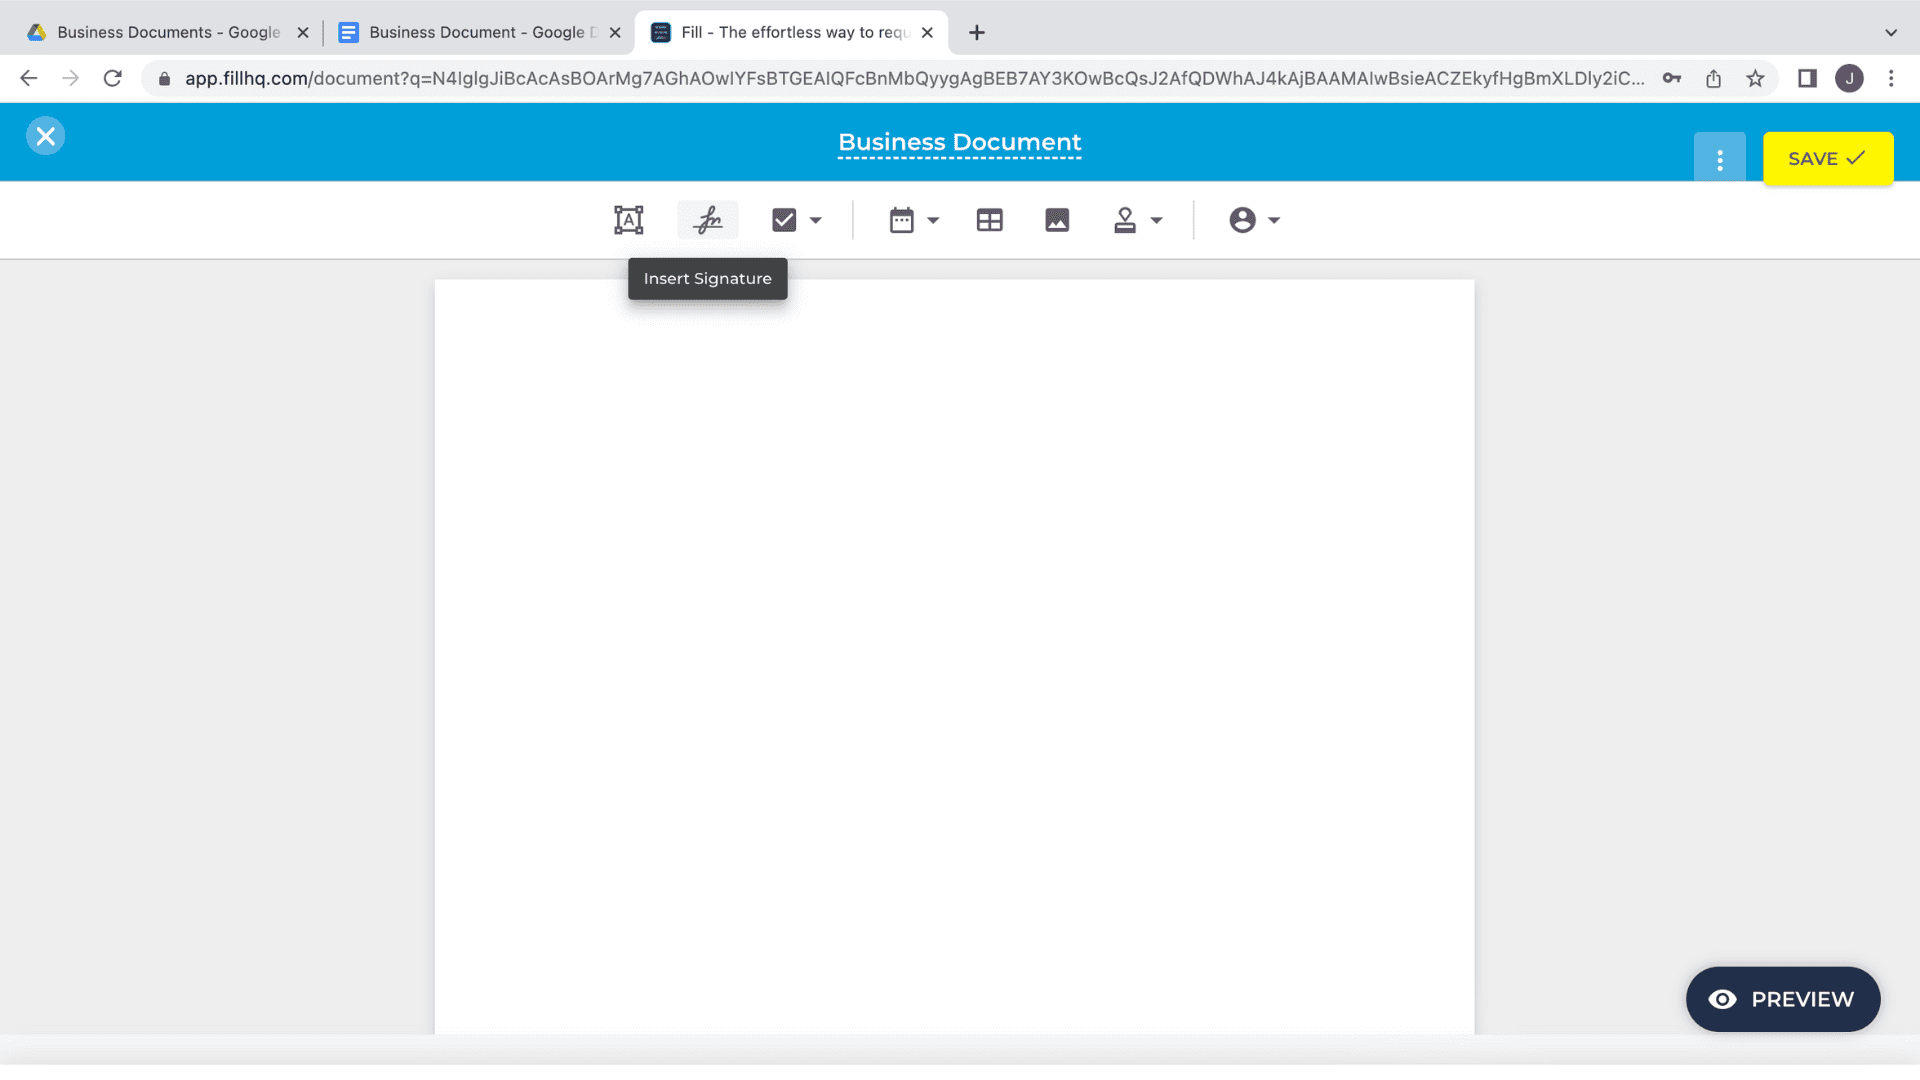
- The document will open in Fill. Locate and click the Insert Signature button on the toolbar to start creating your eSignature.
- Create your digital signature by typing, drawing, or uploading an image of a wet signature.
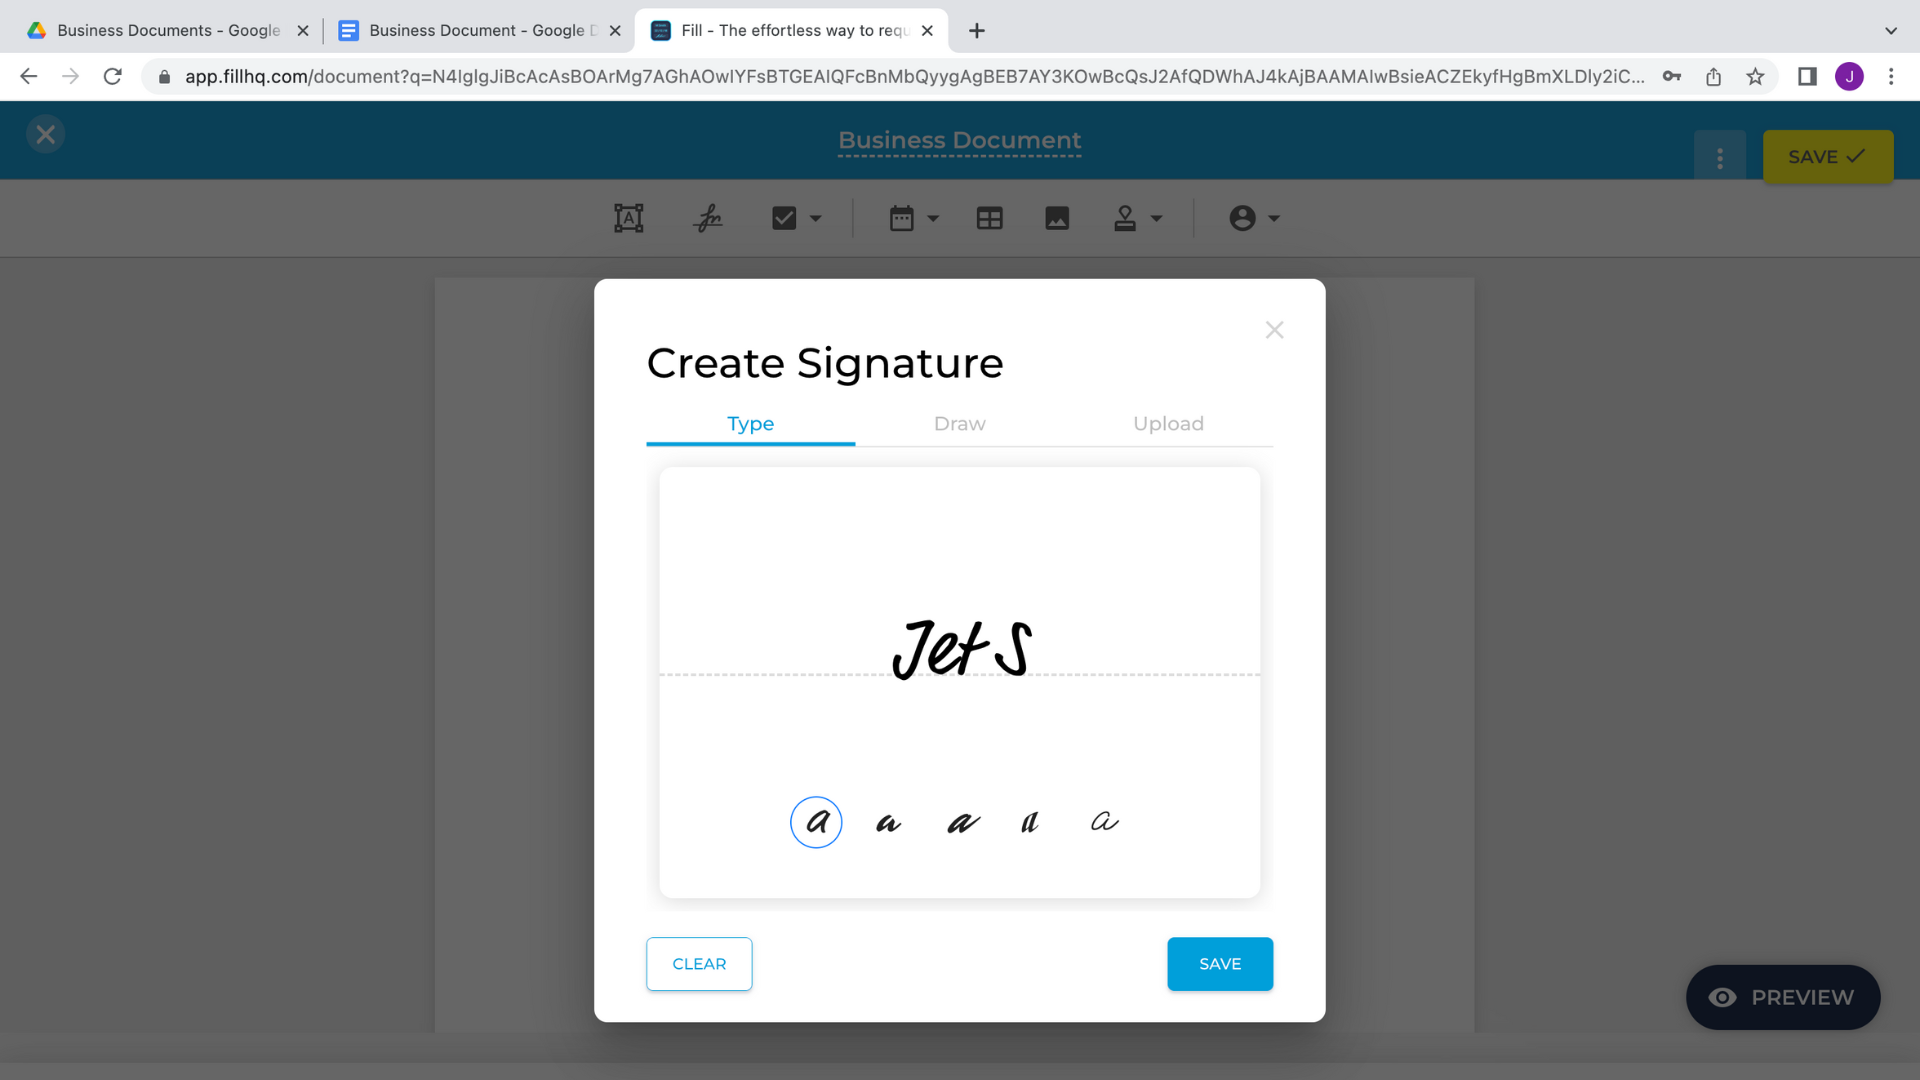
- Save your new eSignature and place it anywhere in the document.
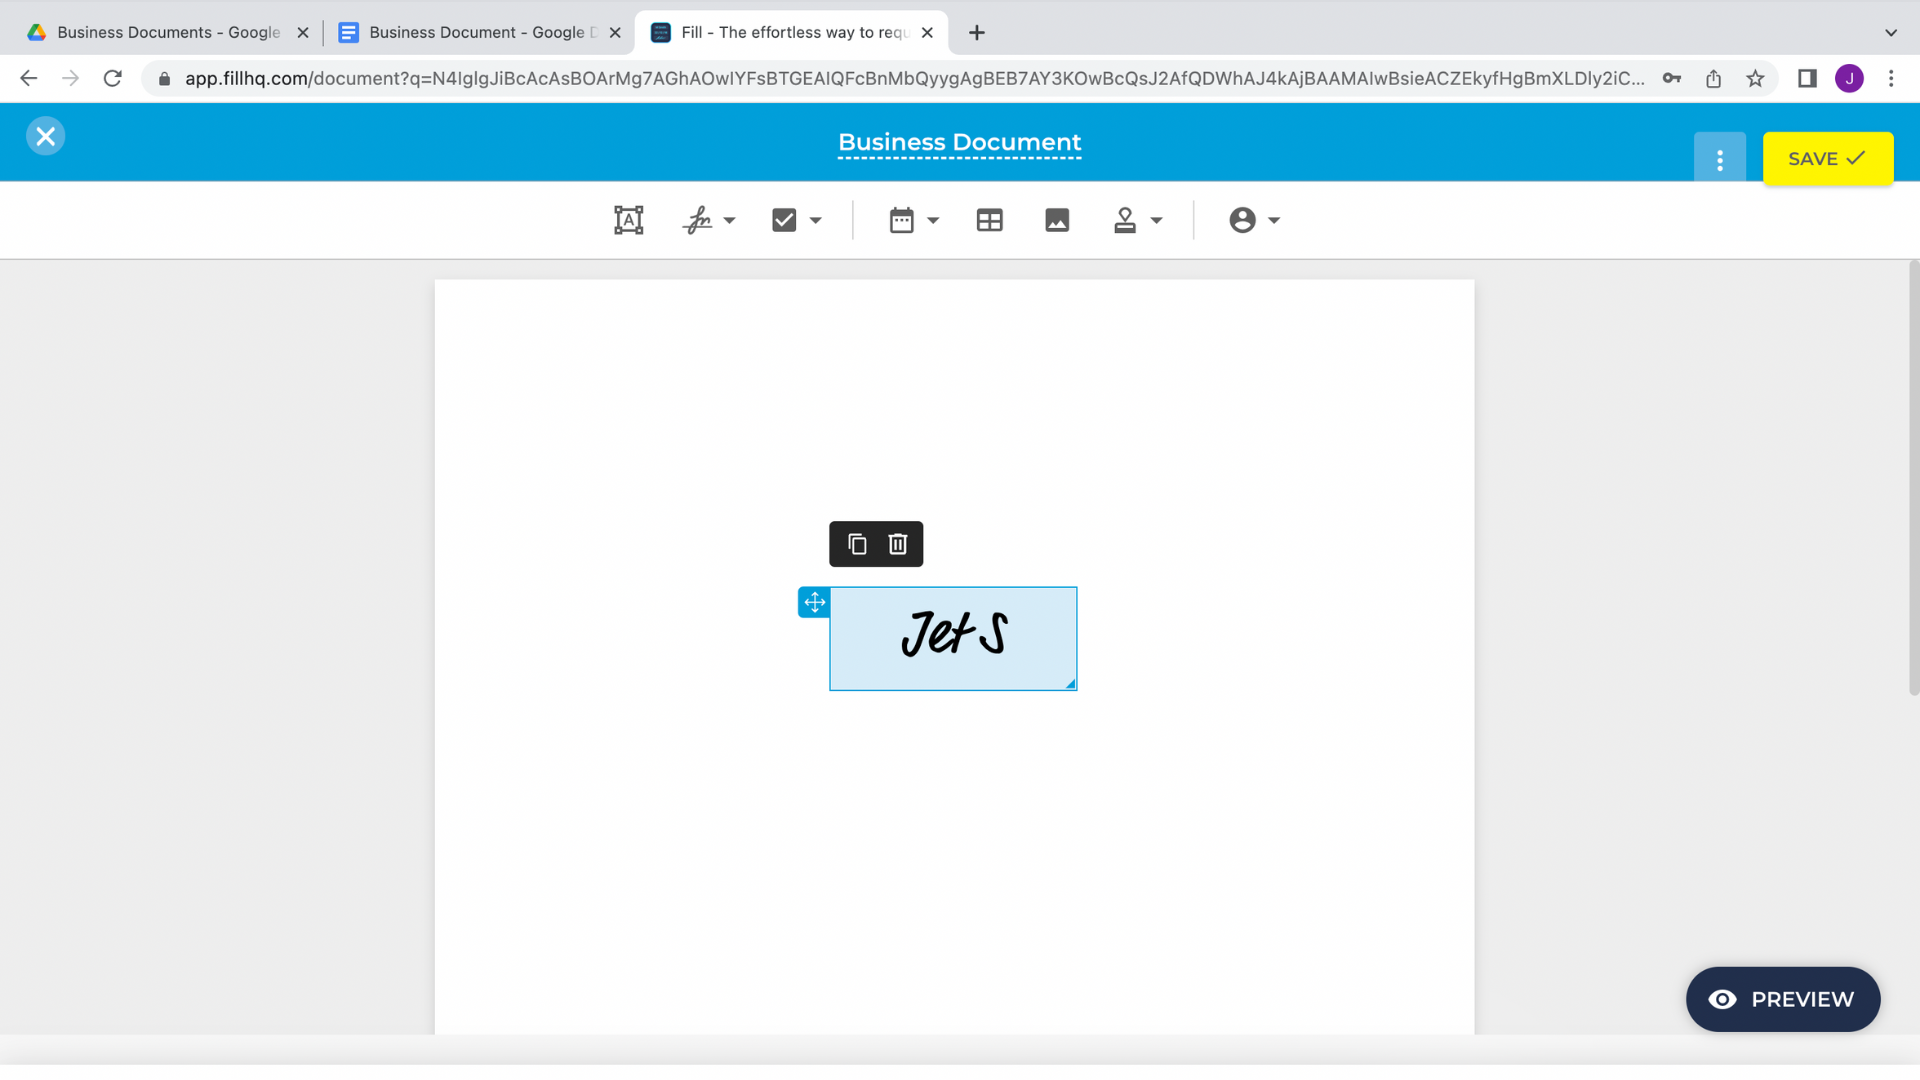
- Then, save the document. You can now send it to anyone using a link or via their email address.

That’s it! With your eSignature now linked to your account, you’ll be able to use it whenever you need to sign a document. You wouldn’t have to draw, type, or upload your signature each time.
Your files are also automatically saved and stored in the Fill app. It syncs across your devices, whether you’re using the web, desktop, or mobile apps.
How to Sign Documents in Gmail
With Fill, it’s now easier than ever to sign files in your email.
If you’re using Gmail, the built-in Google integrations will simplify signing PDF, DOC, DOCX, and Sheets attachments.
Follow the steps below to start signing documents from your email account.
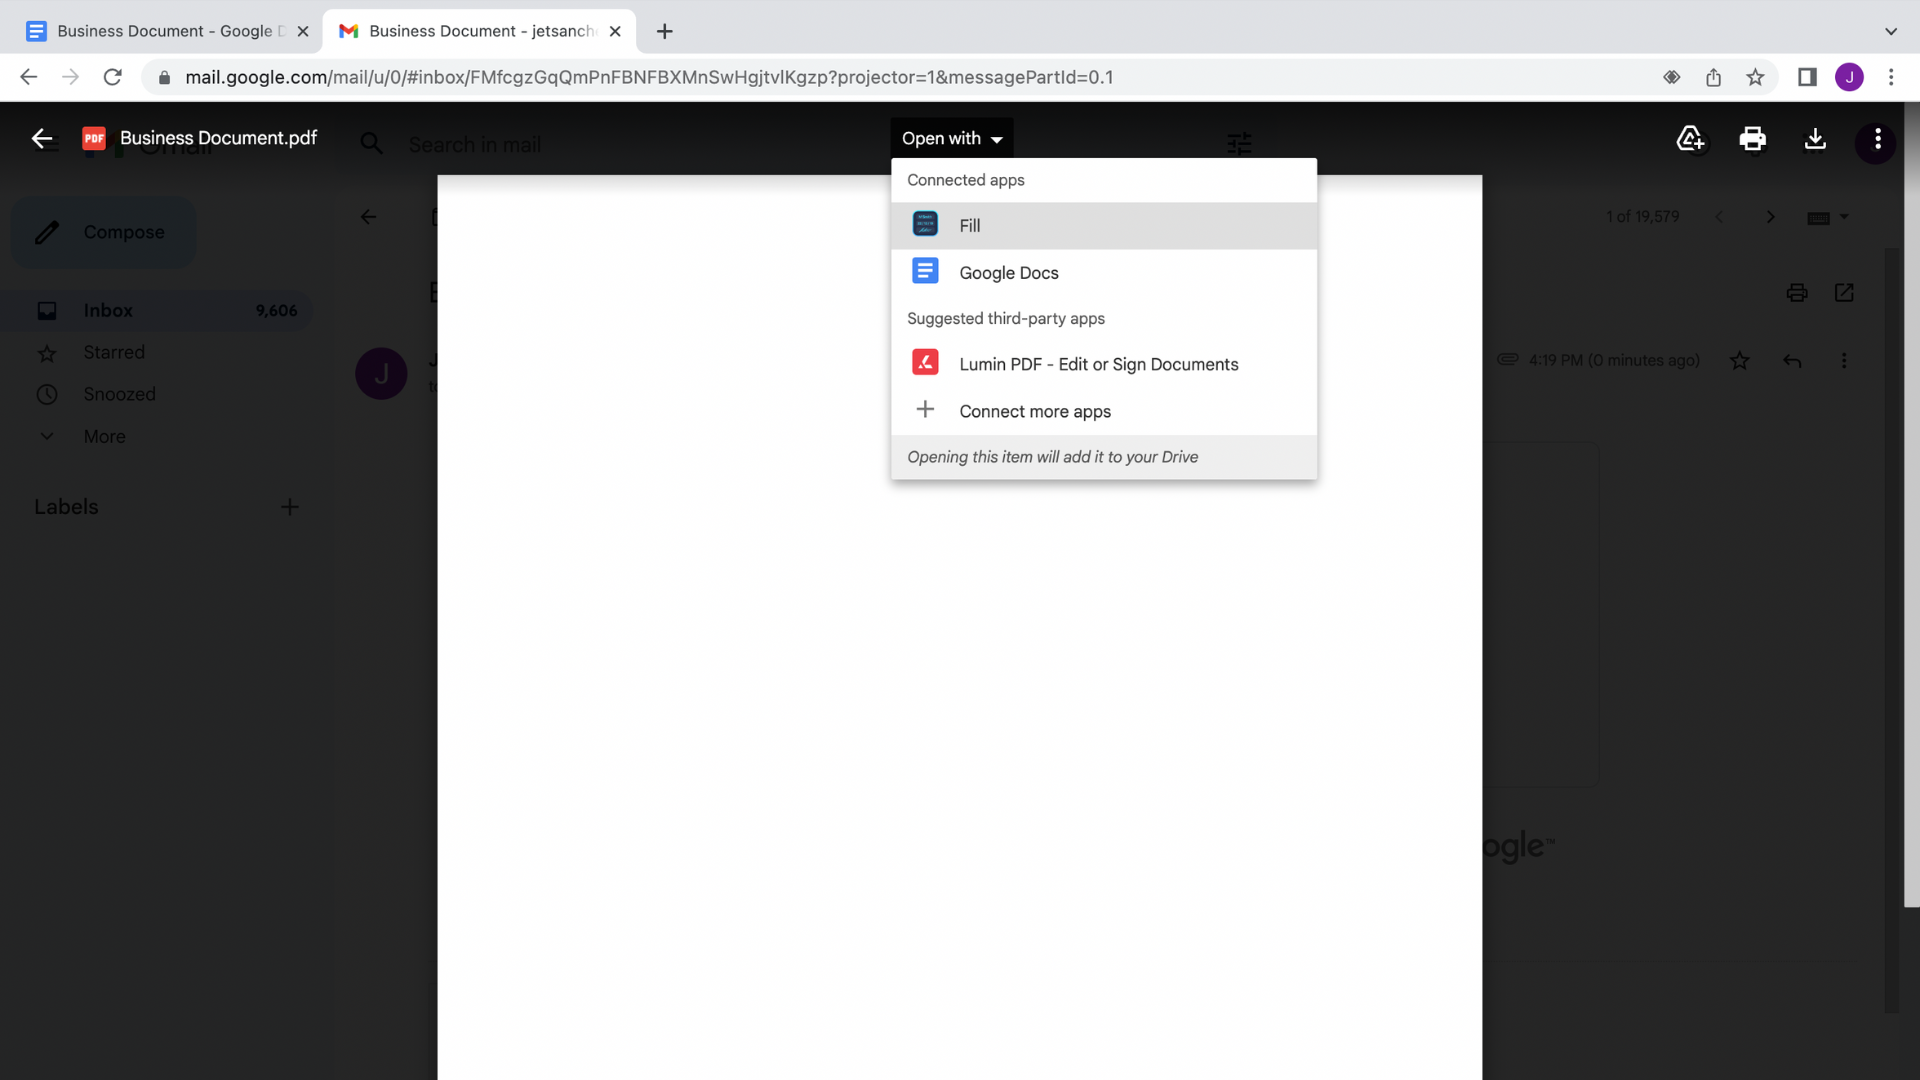
- Open an email attachment in your Gmail Inbox and select Open with Fill.
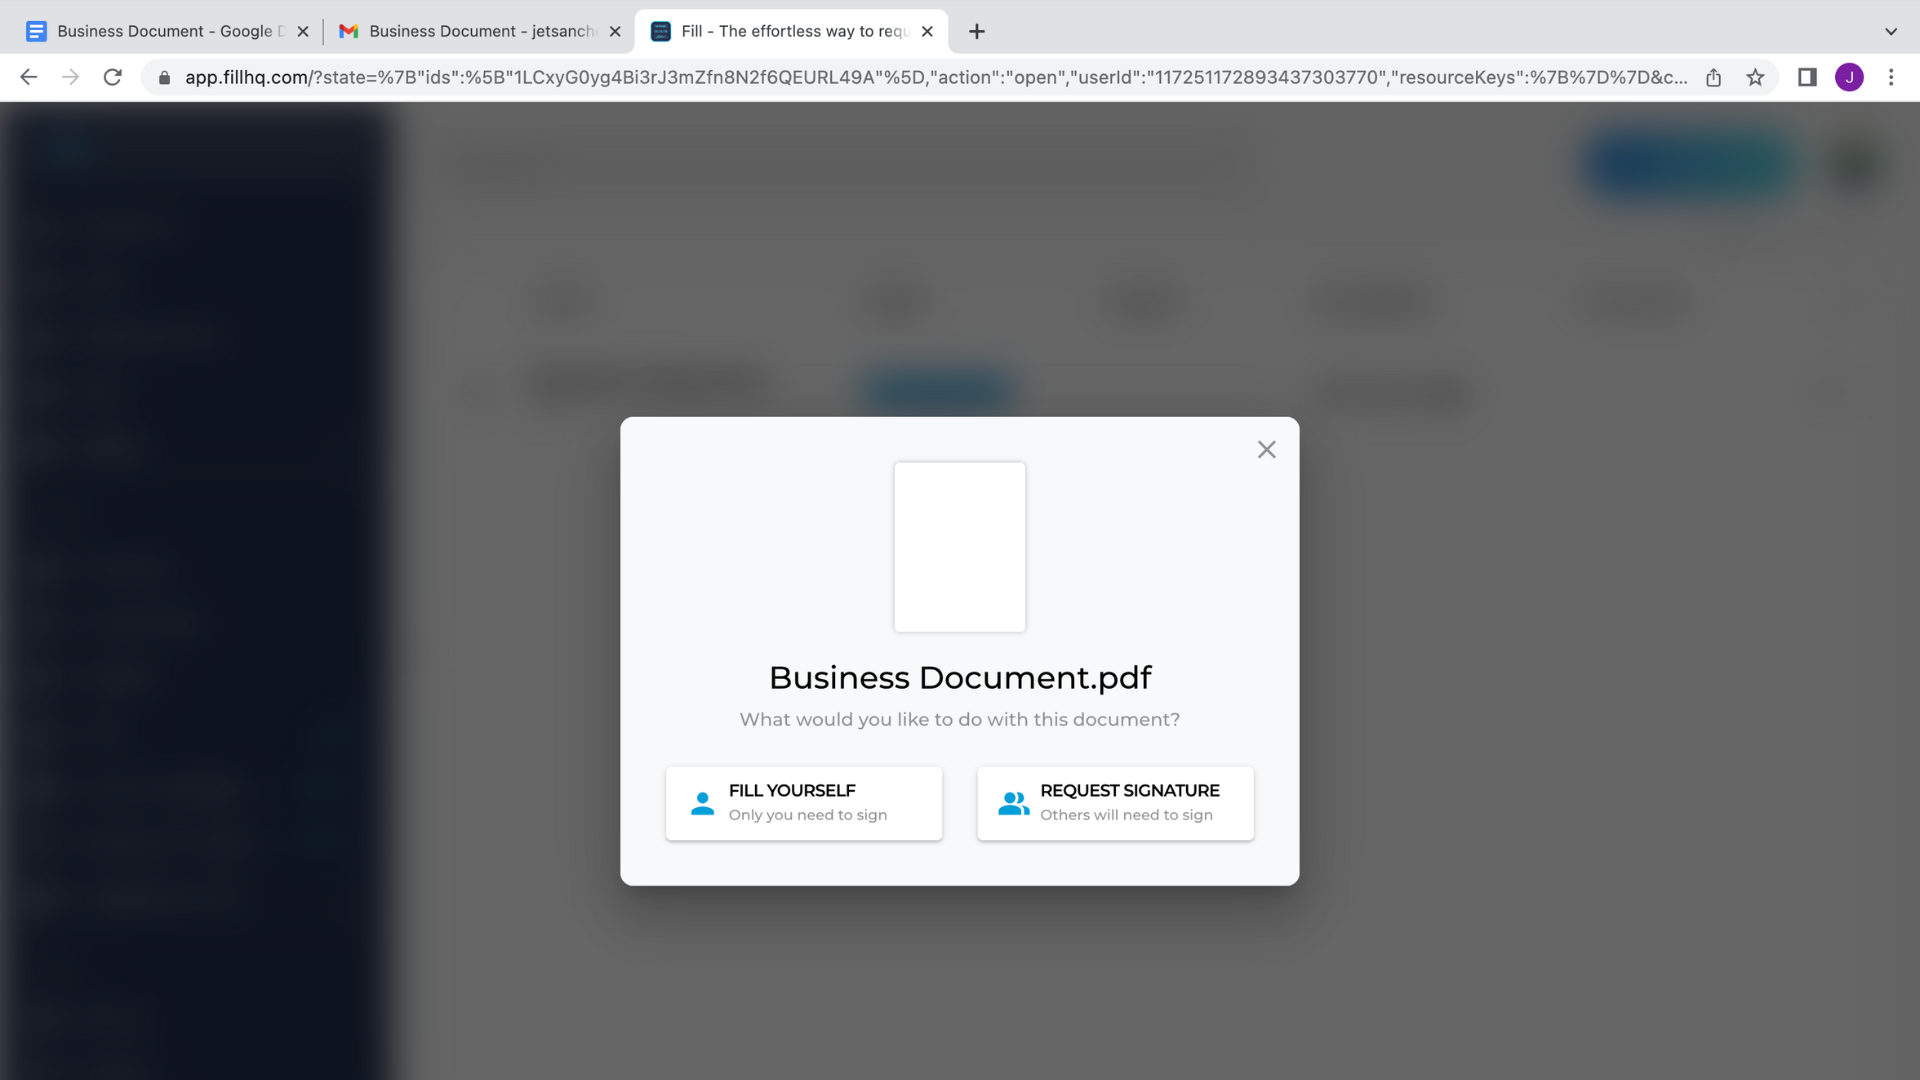
- You’ll be taken to the Fill dashboard, where you’ll decide if you want to sign by yourself or add other signatories.
- You can now edit the document and insert your signature with the designated button.

Create your new digital signature. You can type, draw, or upload an image of your physical signature.

- Next, save your work and place it wherever you need the eSignature.

- Finally, save the document and share it with anyone you want. You can also download it as a PDF file if you’re going to send it directly through Gmail.

Fill makes inserting digital signatures to Gmail documents quick and simple.
With this method, you can sign documents immediately after receiving them in your inbox. You can also share signed files with the Fill app. Plus, you’ll receive a notification whenever someone else views or signs a shared document.
Elevate Your Workflow With Fill
Fill for Google Workspace only scratches the surface. You can also download the Fill for Windows app for more demanding workflows. It features a comprehensive dashboard that power users love.
You can import files directly from Google Drive, Google Docs, and other cloud services. With Fill, you can seamlessly manage your documents and request digital signatures from your contacts.
The app also features virtually uncrackable 256-bit encryption, so you can be sure that it protects your data well. In addition, signer ID verification gives you an additional layer of security to ensure your documents don’t fall into the wrong hands.
Get started with a 7-day free trial and experience a new way to sign documents with Fill.

